If you can’t get a piece of cloth to grip your tank properly, and you can’t source a pair of rubber gloves, rubber bands can work. Get a piece of rubber band, wrap it around your tank tightly and securely, then twist it open bare handed. The added grip is usually enough to unstuck your tank.
Full Answer
Will a vape shop replace a broken tank?
The shop may sell replacement glass and might be able to inspect your mod for damage (and it should be looked over, if something inside jarred loose the safety features may not be fully functional.) Sorry your vape took a nosedive! I'm sorry to hear that you cracked your tank. We have all done it, several times. The shop will not replace the tank.
How to unscrew a stuck vape tank?
If you have a pair of rubber gloves, simply wear them to get a better grip on your tank. This works like a charm and I know a lot of vapers who’ve purchased a pair of rubber gloves simply to unscrew stuck tanks. Garden gloves work, but it fits hands a bit loose, lessening the stability of your grip.
Is your vape tank leaking?
Leaky tanks are a serious problem for any vaper. This guide will help you fix it. The vape tank is one of the most critical parts of a vaping device. The vape tank rests at the production heart of the device, namely where the e-juice is stored and where the e-juice is vaporized into vapor.
Can I put vape juice in my tank?
The central air tube running from the drip tip to the main body of the tank should always be left clear of any vape juice. Make sure to fill your tanks properly and not spill any vape juice in the chimney.

Can a broken vape be fixed?
While it is certainly wise to repair whatever you can before throwing it away, keep in mind that many of the cartridges on the market (even if refillable) come with their own heating elements and other vape parts that are not easily removed or repaired by someone less than an expert.
How do I fix my vape tank?
1:012:26How to Fix a Leaky Vape Tank - YouTubeYouTubeStart of suggested clipEnd of suggested clipMake sure that the o-ring at the base of the tank is there. And isn't damaged a damaged or missing oMoreMake sure that the o-ring at the base of the tank is there. And isn't damaged a damaged or missing o-ring. Can indicate where your leak is coming from make sure you're vaping.
How do you fix a glass vape tank?
0:061:24How to replace the glass on your tank - YouTubeYouTubeStart of suggested clipEnd of suggested clipAnd run through the base section which houses the coil. And then this glass just slides onto theseMoreAnd run through the base section which houses the coil. And then this glass just slides onto these two o-rings. So I grab ahold of this top piece here. And just slide that off if it was broken.
How do you put a vape tank back together?
Once you've filled your tank, screw the top connector and mouthpiece back on. Then, put the coil back in and screw the base back on to fully reassemble your vaporizer. Wait 2-3 minutes before you use the vaporizer. After you've put all of the pieces back together, give the coil 2-3 minutes to saturate.
Can you vape without a tank?
Vape tanks are an essential part of vape gear. If you're a vaper, then you need a vape tank. But sometimes, vape tanks can leak and cause a mess or even damage your device.
How long does a vape tank last?
A clearomizer/tank with a non-replaceable coil head can last from anywhere between one and four weeks (depending on frequency of use and type of e-liquid used). After this period, the coil within it will generally burn out and will need replacing.
Why did my vape tank crack?
The cracks in the tank have been traced to the citric acid found in these flavours, which bind with the polycarbonate, weakening the plastic's structural integrity. These, in turn, leads to cracking or fogging.
Can you still hit a broken cart?
Can you dab a broken cart? If by “broken cart” you're referring to a vape cartridge with a broken glass wall, then the answer is absolutely “no” if you don't want to inhale any of the hemp or cannabis concentrate it still contains into your lungs.
How do I change the glass in my Freemax tank?
0:333:06Fireluke Glass Replacement Tutorial - YouTubeYouTubeStart of suggested clipEnd of suggested clipSo you're gonna unscrew that there's your base with your coil. But wait there's more then what I doMoreSo you're gonna unscrew that there's your base with your coil. But wait there's more then what I do is I just grab the glass right here. Get your hand on.
How do you fix a vape that won't smoke?
Check your tank to make sure you have enough e-liquid. If your tank is completely full but you still have weak vapor, it is possible that your atomizer or coil has been flooded. If this happens, simply take your atomizer apart and clean it with a paper towel or gently blow through it to get the excess liquid out.
Why is my vape on but not working?
If you're using your vape pen's battery correctly but it's not working, inspect the battery's contact point for damage or residue, like excess oil. If it seems clogged, clean it with rubbing alcohol and let it dry before reconnecting it to the cart.
How do you disassemble a vape tank?
How to Take Apart a Vape TankTo remove the atomizer coil, unscrew it by twisting counterclockwise.To remove the glass, wiggle it gently to slide it off of the silicone or rubber o-ring holding it in place.To remove the mouthpiece, lift it straight up to pop it out of its socket.
What do you do when you tinker with a vape?
When vaping, the usual stuff we do when we tinker with our mod and tank is cleaning, refilling, and changing the batteries.
How to unstuck a tank?
If you can’t get a piece of cloth to grip your tank properly, and you can’t source a pair of rubber gloves, rubber bands can work. Get a piece of rubber band, wrap it around your tank tightly and securely, then twist it open bare handed. The added grip is usually enough to unstuck your tank.
What to wear to unscrew a tank?
2. Rubber Gloves. If you have a pair of rubber gloves, simply wear them to get a better grip on your tank. This works like a charm and I know a lot of vapers who’ve purchased a pair of rubber gloves simply to unscrew stuck tanks. Garden gloves work, but it fits hands a bit loose, lessening the stability of your grip.
How to prevent a stuck tank?
To prevent stuck tanks, make sure you don’t screw it on too tight, and you clean your mod and tank at least every week. Clean the part in between the mod and tank to be sure no e-juice gets stuck and dried. After all, an ounce of prevention is worth 10mls of cure. OZ Vapour Team.
How to clean a mech mod?
If you are using a mech mod, you can remove the batteries and soak the mod and tank in warm water mixed with vinegar. This helps clean off dried ejuice as well. Again, remove the batteries first before soaking.
What cloth do I use to grip a tank?
This first method is what works for me and my type of tank. I use a rough piece of cloth, an old chamois cloth will work, and simply use it to grip the tank and twist it off.
Can you unstuck a tank with a grip?
The added grip is usually enough to unstuck your tank. Simple but effective.
How often do vape tanks leak?
Vape tank leakages can happen anywhere at any time. The worst is when it happens in a public place. It can make things embarrassing and awkward, especially if the leakage has stained your clothes. This can happen to any tank, even though the frequency might vary from daily to once a year. This guide not only comprehensively provides solutions for users who are facing frequent tank leaks, but is a must-read guide that provides best practices recommended for any vape user. In order to stop the leaking, you need to find out the source of the leakage and apply the appropriate solutions presented below. Understanding your device and applying the best practices for operating your vaping device will go a long way. In order to find your tank leakage, it is vital to understand the parts of a vape tank.
Why do you tilt your vape tank?
By tilting your tank, it is ensured that the liquid fills up in the right compartment and keeps any liquid away from the air passage. While you are filling your e-liquid in the tank, gradually decrease the tilt or straighten the tank as the tank fills up. This avoids any spills and is particularly applicable for thick (high VG) juices. However, if any liquid manages to get spilled in the center tube, make sure to clean the airway before vaping by:
What is the tank connected to?
The tank is connected with the vape devices using a connector. This connector is responsible for transferring power from the battery to the coil. A “chimney” (air passage) is connected to the coil head and is responsible for transferring the produced vape to the drip tip.
Why is my vape leaking?
If your e-juice is leaking from the air holes on either side of the tank, it is probably due to improper filling of your vape tank. Each tank has a specific e-juice capacity and should never be filled more than that. If a tank is too full, leakage will happen as the e-liquid will flow out of the top fill hole.
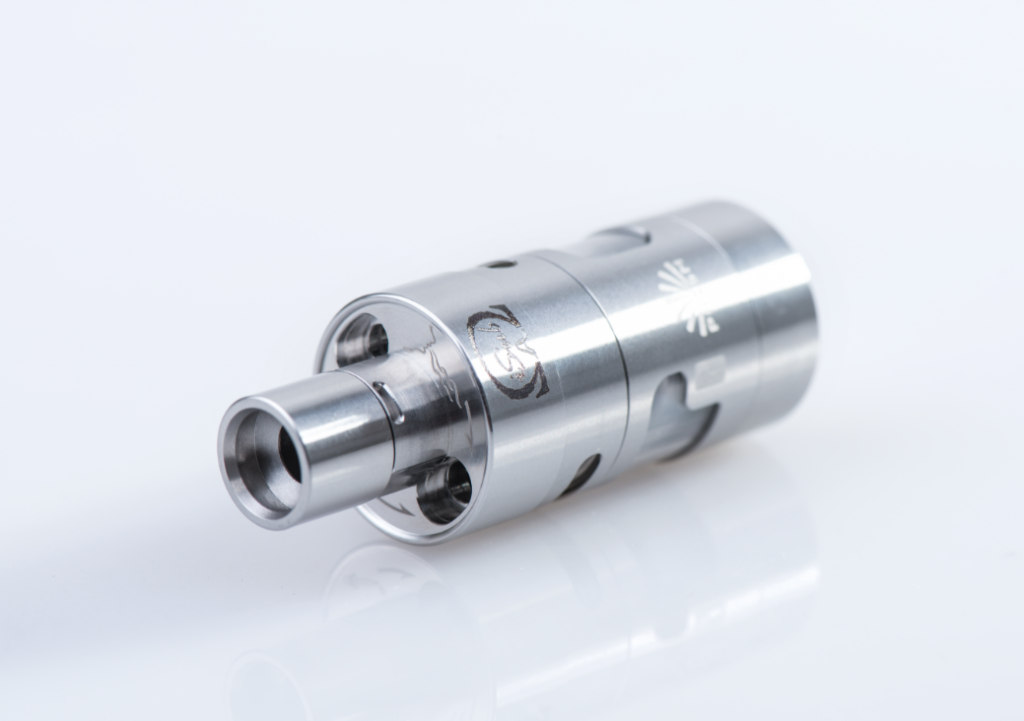
What is the anatomy of a vape tank?
The Anatomy of a Vape Tank. The vape tank is one of the most critical parts of a vaping device. The vape tank rests at the production heart of the device, namely where the e-juice is stored and where the e-juice is vaporized into vapor.
Why is my atomizer tank leaking?
If you feel your tank is leaking at the times you take powerful long drags, it is most certainly due to air restriction .
Why does my e-liquid leak?
If your tank leaks right after you fill it up, it’s because you left the airflow hole or the e-juice hole open. Make it a habit, you simply cannot fill a tank with e-liquid without closing all the holes (valves) of the tank. This creates a path for the e-liquid to travel while you are filling up and even doesn’t stop after closing the tank. That is because a favorable path has been provided for the e-liquid to travel and leak out of the airflow holes. I can’t stress this enough, make sure to close your tank’s airflow and e-juice holes before filling it up.
The Anatomy of A Vape Tank
Leakages from The Air Passage
- Fill Your Tank Properly
Although it may seem rather easy, filling your tank improperly is one of the most probable causes for your tank’s leakage. It is vital to understand the anatomy of your tank. Similar to a chimney, tanks are built with a passageway for the air to travel. The central air tube running from the drip t… - Air Flow Adjustment
Too much restriction in the air intake holes can also cause leakage problems. If you have set the air intake setting of your vape device at the minimum, it means that you’re restricting the amount of air allowed to flow into the tank. This type of setting is preferred by mouth to lung (MTL) user…
Leakages from The Edges Or Sides of The Glass
- Before checking for damaged seals, it is better and easier to check if your tank is fastened properly. Whether your tank is not screwed together tight enough or due to cross threading, e-juice can leak out of the tank. In order to make sure that your tank is assembled free from any leakages, follow these steps: 1. Make sure the threads are in sync and correctly fastened. 2. Make sure th…
Leakages Due to Miscellaneous Reasons
- It is strongly advised to keep your device in a vertical position. The tank should be placed in a vertical/upright position especially for extended periods of time. For example, if you leave your device in a horizontal position overnight, you may find the e-liquid seeping out of the air holes. Whenever you charge your device ensure that the tank is in vertical position. This can also be ac…
Conclusion
- We’ve put in a ton of effort to provide you with all the possible leakage problems along with their solutions to help you take care and avoid your tank from leaking. Get familiar with your device, use it, get to know how it works and keep the above points in mind in order to minimize vape tank leakages. You should also clean your device regularly, clearing out all the residual vapor. Also ke…