What happens when a stator coil dies?
Nov 19, 2012 · Delta on the left, Y on the right. Consider the "R" the coil on the alternator. Our single phase alternators are similar to the Delta in wiring, BUT, we do not draw power from the three points in the Delta (N1,N2,N3). In our alternators, the delta is opened. More of a U, and we just draw power from the two open ends of the U.
How much voltage from stator to coil with no spark?
FYI: The stator coil generates the power for the spark plug and other accessories on small engines Without a stator there would be no spark at all, meaning the engine won't run. While a stator is dying, it can produce a weak spark, causing the engine to miss or run poorly. Symptoms are often worsened as the engine warms up.
How do you replace the insulation paper on a stator?
Step 3: Star or Delta Windings. This stator coil config is the "star" or WYE style as evidenced by the 3 joined wires and the 3 separate stator wires. Simplified explanation is that star gives more voltage and delta gives more amps for a given rpm. Since we want more volts at a lower rpm it stands to reason we will configure our stator windings ...
How to test the voltage out of the stator?
AC Output Test. Put your multimeter to AC Volts and start you vehicle. As with the Ohms test, test between each lead of the connector (1-2, 2-3, 3-1) and note the readings. They should all be the same (E.g. 20v/20v/20v). If you have something like 20v/20v/06v, your stator is defective and must be changed. If you think you have a defective ...
How many ohms should a stator have?
Can a stator be rewound?
How do you rewire a stator coil?
What voltage should a stator put out?
Is it possible to repair a stator?
How do you test a stator with a multimeter?
How stator winding is done?

Why does my stator keep burning out?
How does a 3 phase stator work?
What is a stator coil?
The stator coil generates the power for the spark plug and other accessories on small engines Without a stator there would be no spark at all, meaning the engine won't run. While a stator is dying, it can produce a weak spark, causing the engine to miss or run poorly. Symptoms are often worsened as the engine warms up.
What happens if you put a wire in the wrong place on a contact breaker?
If you put this wire in the wrong place on the contact breaker, it will directly contact the first wire and bypass the switching effect of the system. Without the switching effect of the contact breaker, the spark will never fire.
How to access flywheel on Honda XR?
Here are the steps to gain access: -Remove the side cover over the flywheel. Depending on your model this may be the left or right cover, and may also be holding back oil. On my honda xr, I removed the left side cover to access the flywheel, and it did not hold back any oil. -Remove the flywheel.
Why does the wiring pass through the engine?
The only reason the wiring passes through the engine is to reach the contact breaker system. The contact breaker is simply a switch inside the flywheel that triggers the spark plug to fire at the right moment in the combustion cycle. The engine is not actually producing any power for the ignition system.
Step 1: Pull It Apart
This is relatively simple, 3 long bolts and the case is apart. Then remove the field connection brushes from the rear of the case, it has the letters F and N on the connector, being field and neutral. Once everything is apart, check the bearings for wear, they should turn freely without noise of grinding.
Step 2: Ripping Out the Old
I'll start off with the caution. The wiring varnish/shellac has sharp edges, so be careful when removing the old windings. The original windings were 13 turns of 1.2mm dia and I reduced the wire diameter to 0.75mm in order to double up on the windings, fitting in 30 turns in each stator slot.
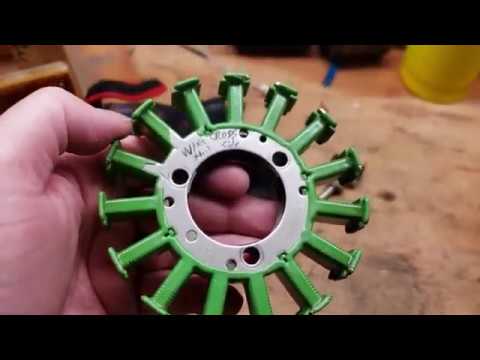
Step 3: Star or Delta Windings
This stator coil config is the "star" or WYE style as evidenced by the 3 joined wires and the 3 separate stator wires. Simplified explanation is that star gives more voltage and delta gives more amps for a given rpm. Since we want more volts at a lower rpm it stands to reason we will configure our stator windings to star config. If your stator had only 3 connection wires with 2 wires joined on each connection, then you would have a delta connected stator..
Step 4: Sliding in the New
By the way, I salvaged the enamelled copper wire from an old fridge motor, for what its worth. In this 3 phase 4 coil wind in 24 stator slots, we start by inserting the 1st coil and skipping 2 slots for the other 2 phases. Even the start wire (lead in) and the exit wire (lead out) are separated by 2 slots as can be seen in the pics below. 120 degree phase separation mistake. It has been pointed out to me that my phases haven't been wound with a 120 degree separation, more like 60 degrees, which will most likely result in low voltage output. I should have left an empty slot between the lead out wires, so a rewind will be necessary to correct this mistake..
Step 5: New Rethink
I decided to add slot-insulation just in case of a wire short to stator edge or something else. So I used Ganex DMD 2-3-2 0.18mm which is half the price of the Nomex stuff yet still good till 150 degrees C. DMD stands for Dacron-Mylar-Dacron, for what its worth. I also used a "D profile" fibreglass rod called a topstick to keep the wires in the stator slots. Lastly the windings are treated with a shellac or varnish to keep them in place and also to prevent loose wires from vibrating which might cause shorts etc..
Step 6: 120 Degree Phase Separation Rewind
I decided to rewind the stator with the correct 120 degree phase separation and check performance before jumping to any conclusions. The exit wires to the diode pack need a 1 slot spacing between them for the 120 degree phase power output.
Step 7: Closing Up
First install the Diode pack, then once the diode pack is installed, the end coil wires can be soldered on. Slide the rotor in to check for fit, nothing touching or scraping, and then the front case half can be installed. Lastly install the brushes for the field rotor coil and hook up all spade connectors and plastic covers. The N Neutral conn is used as a voltage sense for the regulator, the F field goes via the alt warning light on the dashboard to the regulator. The case is connected to batt neg and the big threaded rod from the diode pack goes to the batt positive..
Ohms Test
You will need a multimeter set to Ohms for this test. Test every lead of the stator’s connector and note the readings. The reading of each combination should be the same (test leads 1-2, 2-3, and 3-1). If they are different, your stator is defective.
Ground Test
Set your multimeter to Ohms. Put the negative lead on the engine’s ground and the positive lead on each wires of the stator’s connector one by one. You shouldn’t get a reading at all. If you get a reading, even very small, on any wire, the stator is defective and must be changed.
AC Output Test
Put your multimeter to AC Volts and start you vehicle. As with the Ohms test, test between each lead of the connector (1-2, 2-3, 3-1) and note the readings. They should all be the same (E.g. 20v/20v/20v). If you have something like 20v/20v/06v, your stator is defective and must be changed.
How to force armature out of stator?
Force the armature out of the stator by hand. Once you’ve removed the upper endplate from the motor housing, guide the armature straight out the bottom of the circular stator, along with the attached lower endplate. You'll encounter some resistance from the magnets around the stator, which means you may have to push a little harder than you might expect before it will give way.
How to rewind a motor?
To rewind an electric motor, remove the motor's outer housing and use your hands to pull the armature out of the stator. Then, use a flat head screwdriver to pry open the tabs on the brush pads, and then cut through the wires and pull them out by hand. Once you have the coil off of the armature and stator, wind a new wir e of the same thickness and material into the armature. Be sure to coil the wire the same number of times to ensure a proper fit for conductivity, and secure the coil with tabs before reassembling the motor. For tips on identifying the coil pattern and handling the motor during disassembly and assembly, scroll down!
What is the armature of a motor?
The armature (also known as the “rotor”) is a small bearing-like piece in the center of the motor construction. When it receives the magnetic force of the stator and windings, it spins, powering the motor. The windings are long coils of copper wire typically located around the stator.
Why do you wear gloves on stators?
Wear gloves to protect your hands and avoid transferring the oils from your skin to any part of the stator or armature .
How to remove motor housing?
On most types of small motors, this will require you to unfasten four screws from around a small endplate on the top and bottom of the unit. Once they’re out of the way, you’ll be able to see each of the motor’s primary internal components, including the stator, armature, and windings.
Where are the windings located on a motor?
The windings are long coils of copper wire typically located around the stator. They channel electromagnetic energy into the rotor to cause the motor to turn.
Can you cut out a winding?
Cutting out the spent windings can be painstaking work. It may be necessary to sever one wire at a time to make removing the coils more manageable.
How to tell if a coil is bad?
Check for 0.1 ohm ~ 1.0 ohm across the two primary coil terminals. This isn’t exactly definitive, as we have seen working coils with 0.0ohms resistance. The best way to tell if the coil is bad is to perform steps the steps above. If there is still no spark, the coil is likely bad.
How to bypass a switch?
How to bypass your switches 1 Create a jumper wire from pin #4 directly to a good grounding spot on the engine. 2 Being very careful not to deform or break the pin, remove the #5 wire from the CDI plug at the harness. This can be done with a sharp narrow tool like an ice pick or stiff paper clip. Looking from the front of the plug, you will see small metal tabs on each pin which secure them to the plug. Push the tab down and the pin will release. Don’t use force here.
How to check CDI voltage?
Just like before: while cranking the engine, use a multimeter to check for voltage at the two primary wires of the ignition coil. Connect your back multimeter lead to the black ground wire at the coil, and with the red lead to the lighter color wire (usually blue or purple, but it varies). At this step we are checking to see exactly what the CDI is outputting. Write the voltages down and continue to the next step.
How to remove #5 wire from CDI plug?
Being verycareful not to deform or break the pin, remove the #5 wire from the CDI plug at the harness. This can be done with a sharp narrow tool like an ice pick or stiff paper clip. Looking from the front of the plug, you will see small metal tabs on each pin which secure them to the plug. Push the tab down and the pin will release. Don’t use force here.
What voltage should a CDI wire be?
There should be between 20vAC ~ 100vAC coming from the CDI power wire (Black/Red), although much lower voltages will still be able to produce spark.
Where do you plug the black and red wires in a car?
Locate and disconnect the Black/Red and Blue/Yellow wires coming from the stator, where they plug into the main engine harness. (These are both bullet-style connectors)
Why is my spark plug not working on my GY6?
The plug is very rarely the cause of no spark on the GY6. If the plug is fouled or cracked it may not spark. Ensure that the spark plug is gapped properly.Recommended spark plug gap: 0.6mm ~ 0.7mm (0.23″ ~ 0.27″)