
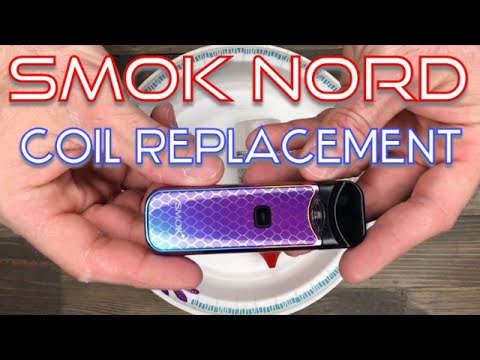
Smok Qbox — How to Change the Coil Unscrew the top and have paper towels handy in case there is liquid inside. Once that is done, put the top back on, unscrew the bottom, and then remove the glass. With the bottom in hand, unscrew the coil.
Full Answer
How to replace a vape coil?
This product is intended to be used with e-liquid products containing nicotine. Nicotine is an addictive chemical. Important Safety Information and Warnings. You have to make sure that your age is 21 or older, then you can browse this website further. Otherwise, please leave and close this page immediately!
How long do vape coils last?
Sep 01, 2021 · Clean up the vape juice using a tissue or handkerchief. By putting the pod upside-down, pull out the coil, if there is any. Now apply the e-juice over the wicking material (cotton), till the cotton windows from the outside appear wet. Now, install the new coil. Locate the hole at the pod's base and with the flat walls that are close to the hole ...
How do I use the cotton in my vape coil?
Sep 13, 2019 · Smok Qbox — How to Change the Coil. Unscrew the top and have paper towels handy in case there is liquid inside. Once that is done, put the top back on, unscrew the bottom, and then remove the glass. With the bottom in hand, unscrew the coil. Use pliers if you are having trouble removing it. Make sure it is on tight or it might leak.
Can you change the coils on a multiple coil atomizer?
Jul 20, 2017 · Step One: Empty out your vape tank if necessary. Step Two: Unscrew the base from your tank. Step Three: Unscrew your coil, then separate the top portion of your tank so you can replace your coil. Step Four: Attach your new coil to your tank, then re-attach your atomizer parts in the reverse order you took them apart.

How do I change the coil in my SMOK vape?

- Step 1 Coil. Unscrew the tank from the mod. ...
- Make sure there is no vape juice in the tank. You may dispose of any excess juice by pouring it into the trash. ...
- Disconnect the filter and the atomizer from the bubble tank. ...
- Unscrew the coil from the filter. ...
- Throw the old coil away. ...
- Screw the new coil into the filter.
How do you install a SMOK coil?
How do you take the coil out of a SMOK tank?
![Part of a video titled How To Change Smok TFV Mini V2 Coil & When [Step-by-Step]](https://img.youtube.com/vi/dOznKYDxKgc/hqdefault.jpg)
How do you open a SMOK vape?
How do I know when my coil needs changing?
- Burnt Taste. The first and most prominent way to tell your coil needs changing is by experiencing an unpleasant burning taste in your vape.
- Bubbling Noise. In this case, your device is literally telling you to change the coil. ...
- Weak Flavour. ...
- Little Vapour. ...
- Leaking Device.
How do you change a Smok Nord coil?
How to remove a vape coil?
How to remove the vape coil properly? 1. When you unscrew the coil, please pay attention not to screw it at a slant angle. 2. When coil has been used for a long time, you can use dry cloth or paper (with stronger friction) to unscrew if it is not easily unscrewed.
When you unscrew a coil, please pay attention to it?
When you unscrew the coil, please pay attention not to screw it at a slant angle. 2. When coil has been used for a long time, you can use dry cloth or paper (with stronger friction) to unscrew if it is not easily unscrewed.
Knowing the exact time of Replacement
It is important to figure out when you actually should replace the coil and thus following are the indicators that mean it is now the right time for a newer coil-
Knowing the SMOK Nord Coils
Also known by the atomizer head, the SMOK Nord Coils are available in 3 kinds - Regular, Mesh and Ceramic. Each pack holds 5 coils. The Coil Resistance of Mesh Coils are available as 0.6Ω and 0.8Ω which are suitable for sub-ohm vaping. The regular and mesh coils are made up of kanthal material.
How do you select the best coils?
This becomes easy once you pen down your vaping requirements. What is the size of clouds you need, what kind of flow pleases you the most? Remember, the higher the resistance the less is the flow of your vapors which means the cloud size will be lesser in higher resistance coils.
Replacing the Coil!
This is quite easy stuff. Just dismantle the pod from the body. Clean up the vape juice using a tissue or handkerchief. By putting the pod upside-down, pull out the coil, if there is any. Now apply the e-juice over the wicking material (cotton), till the cotton windows from the outside appear wet. Now, install the new coil.
Is Smok Qbox good for vaping?
Mostly, the Smok Qbox will provide its owner with a positive vaping experience. It puts out a good-sized cloud for the wattage; the coils provide a pretty good flavor, and the feel of it in your hand, pocket, or purse only adds to the experience.
What is the Smok Qbox?
The first and most obvious feature of the Smok Qbox is its design. The edges are perfectly rounded to prevent it from chafing while it is in a pocket; it can be carried around all day without the owner noticing it. It also comes with the TFV8 Baby Beast Tank, which is one of the most versatile tanks out there, utilizing a wide range of coils, holding 3 ml of e-juice, and offering airflow control.
Is the Smok Q box bigger than the wall charger?
This vape features a durable zinc alloy exterior and is smaller than a deck of cards. Put another way, the Smok Q-Box is not much bigger than a wall charger adapter. It should fit anywhere on your person.
How to replace coils in a vape?
Step One: Empty out your vape tank if necessary. Step Two: Unscrew the base from your tank. Step Three: Unscrew your coil, then separate the top portion of your tank so you can replace your coil. Step Four: Attach your new coil to your tank, then re-attach your atomizer parts in the reverse order you took them apart.
How long does a vape coil last?
The answer to this varies depending on how frequently you vape, but typically, the average lifespan of a coil is around two weeks (this can depend on a variety of aspects!).
What is the difference between a top coil and a bottom coil clearomizer?
Top coil clearomizers are filled from the top and result in warm, flavorful vapor. Bottom coil clearomizers are a bit harder to fill since the juice can’t be inserted from the top, but are undoubtedly worth the extra effort: they provide a unique throat hit that provides cool vapor of the highest quality.
What is a top coil clearomizer?
Top coil clearomizers are perfect for vape wizards seeking a cloud chasing experience that provides warm, flavorful vapor and thick, vibrant clouds. Replacing a top coil clearomizer is quick and easy; once you learn the proper steps required to change out the coil, you’ll be able to perform the task in a flash.
How to disassemble a top coil clearomizer?
Step One: Begin by emptying out your tank. When disassembling a top coil clearomizer, the stem of the atomizer comes out along with the base and atomizer head, so starting with an empty tank ensures that you’re able to access the coil quickly and efficiently. Step Two: Next, unscrew the base and coil head. If done properly, the stem should come out ...
How to change clearomizer coil?
Step One: Invert your clearomizer so it is upside-down. Step Two: Unscrew your base and atomizer head from the bottom. The stem will remain intact inside your clearomizer. Step Three: Screw on your new coil, and reattach the base and head in the reverse order you took them apart.
Do atomizers have coils?
As if cartomizers and clearomizers weren’t enough, there are also a couple other different types of atomizers. Certain atomizers come with multiple coils. This allows heat to spread evenly throughout the atomizer, which results in cooler vapor with a stronger throat hit.
Introduction
The Smok Mag 225 Vape is a good choice for beginners of the hobby along with people who have been enjoying it for years. The coil only last so long, and one might not know how to replace it. The coil is easy to replace but there are no guides on it.
Team
Choose a size and copy the code below to embed this guide as a small widget on your site / forum.
Shawn Hoefer ECF Guru Verified Member ECF Veteran
What does the coil, at room temp, read when attached initially? What is the coil material?
Shawn Hoefer ECF Guru Verified Member ECF Veteran
Take the tank off. Fire the mod. It should give you an error message like "no atomizer". Reattach the tank, fire the mod quickly. What does the resistance read in at?
Topwater Elvis Vaping Master ECF Veteran
If you have the qbox kit, it came with the baby beast ‘tank’ & 2 m2 .25Ω replacement heads.
avirs1 New Member
I was having the exact same issue with my qbox, tfv8 baby m2 coil. I used a tissue to thoroughly clean the tank box connection and now its working properly again, ohms do not change from the original setting. Hope this helps.
stols001 Moved On ECF Veteran
Hi, Welcome to ECF, you've gotten some good suggestions above and I hope one works for you. Welcome, and hope you enjoy your stay!