How to Replace a Vape Coil
- Method 1 Disassembling the Vape Download Article. Unscrew the tank from the body of the vape to expose your coil. Every...
- Method 2 Adding a New Coil Download Article. Pre-saturate your coil with 5-8 drops of vape juice. The cotton in your...
- Method 3 Knowing When to Replace the Coil Download Article. Replace the coil every 1-2 weeks on average.
Full Answer
How to replace a coil in a vape?
Vape Replacement Coils: How & When To Replace Them (5 Step Guide)
- Replacing Your Cartomizer. As aforementioned, most cartomizers are disposable, which makes replacing them very simple. ...
- Replacing Your Multiple Coil Atomizer. Multiple coil atomizers are great for those seeking a lavish, extra-indulgent vape experience. ...
- Replacing Your Top Coil Clearomizer. ...
- Replacing Your Bottom Coil Clearomizer. ...
How often should you replace vape coils?
How do you know when your vape coil needs changing?
- Burnt Taste. The first and most prominent way to tell your coil needs changing is by experiencing an unpleasant burning taste in your vape.
- Bubbling Noise. In this case, your device is literally telling you to change the coil.
- Weak Flavour.
- Little Vapour.
- Leaking Device.
Which coil is best for vape?
Top 8 Best Coils for Flavor – Our Reviews:
- Clapton Coil. A Clapton is arguably the best option when it comes to flavor. ...
- Fused Clapton Coil. Arguably the most popular coil at the moment because of its easy build, the Fused Clapton coil can offer you better vapor and outstanding flavor.
- Alien Coil. ...
- Framed Staple Coil. ...
- Tiger Coil. ...
- Hive Coil. ...
- Tidal Wire Coil. ...
- Flat Bastard Coil. ...
How long does a coil last in a vape pen?
The lifespan of a coil is depends on your vaping habits.Generally you need to change coils every 1 to 4 weeks of usage. If you vape very frequently, you may find that your coil only lasts for between five and seven days. If you vape moderately, it may last you a couple weeks.

A Brief Atomizer Breakdown
To start things off, let’s go through a quick refresher course. What is an atomizer? Vape fans usually have a basic understanding of the term and h...
Other Atomizer Variations
As if cartomizers and clearomizers weren’t enough, there are also a couple other different types of atomizers. Certain atomizers come with multiple...
Replacing Your Cartomizer
As aforementioned, most cartomizers are disposable, which makes replacing them very simple. 1. Step One: Begin by removing the drip tip from your c...
Replacing Your Multiple Coil Atomizer
Multiple coil atomizers are great for those seeking a lavish, extra-indulgent vape experience. Changing the coils for this type of atomizer is much...
Replacing Your Top Coil Clearomizer
Top coil clearomizers are perfect for vape wizards seeking a cloud chasing experience that provides warm, flavorful vapor and thick, vibrant clouds...
Replacing Your Bottom Coil Clearomizer
Replacing a bottom coil clearomizer is much like replacing a top coil one, but with one extra benefit—you can do it without having to empty out y...
Replacing Your Sub-Ohm Atomizer
Sub-ohm tank atomizers provide cloud chasing experts with the thick, cool vapor they crave and the freedom to have extra control over their clouds....
How to replace coils in a vape?
Step One: Empty out your vape tank if necessary. Step Two: Unscrew the base from your tank. Step Three: Unscrew your coil, then separate the top portion of your tank so you can replace your coil. Step Four: Attach your new coil to your tank, then re-attach your atomizer parts in the reverse order you took them apart.
How long does a vape coil last?
The answer to this varies depending on how frequently you vape, but typically, the average lifespan of a coil is around two weeks (this can depend on a variety of aspects!).
How to change clearomizer coil?
Step One: Invert your clearomizer so it is upside-down. Step Two: Unscrew your base and atomizer head from the bottom. The stem will remain intact inside your clearomizer. Step Three: Screw on your new coil, and reattach the base and head in the reverse order you took them apart.
What is a top coil clearomizer?
Top coil clearomizers are perfect for vape wizards seeking a cloud chasing experience that provides warm, flavorful vapor and thick, vibrant clouds. Replacing a top coil clearomizer is quick and easy; once you learn the proper steps required to change out the coil, you’ll be able to perform the task in a flash.
How to disassemble a top coil clearomizer?
Step One: Begin by emptying out your tank. When disassembling a top coil clearomizer, the stem of the atomizer comes out along with the base and atomizer head, so starting with an empty tank ensures that you’re able to access the coil quickly and efficiently. Step Two: Next, unscrew the base and coil head. If done properly, the stem should come out ...
What is a multiple coil atomizer?
Multiple coil atomizers are great for those seeking a lavish, extra-indulgent vape experience. Changing the coils for this type of atomizer is much like changing the coils for any other atomizer, except you’ll be changing multiple coils instead of just replacing one.
What is the difference between a top coil and a bottom coil clearomizer?
Top coil clearomizers are filled from the top and result in warm, flavorful vapor. Bottom coil clearomizers are a bit harder to fill since the juice can’t be inserted from the top, but are undoubtedly worth the extra effort: they provide a unique throat hit that provides cool vapor of the highest quality.
How To Change a Heating Coil in A Dab Pen?
Dab pens are easy, hassle-free solutions for those that love dabs but hate having to navigate a traditional dab rig set up. However, using a dab pen is not without its chores, and one of the most important parts of dab pen maintenance is regularly changing the heating coils.
Changing a Heating Coil in a Dab Pen
Most dab pens have three important components you'll need to be familiar with in order to change the heating coils: the mouthpiece, the heating chamber lid, and the heating chamber/heating coils themselves. All of these pieces will be located toward the top of the pen since the bottom is dedicated to housing the battery or storing extra wax.
How Do I Know When to Change Coils?
It may be a pleasant surprise to see that changing heating coils in a dab pen is usually a very easy process. However, it is much more challenging to know when to change coils when compared to how to change them. Fortunately, there are tell-tale signs that you can look for that will be clear indicators that it is time to change the heating chamber:
Where to Buy New Vape Coils?
Most retailers that carry dab pens also have replacement coils. If you have a vape shop or head shop, check and see if they have heating coils for your specific model. Your inventory options will likely be limited. For a full selection of available coils, online retailers are your best option, which includes here at Vape Vet Store.
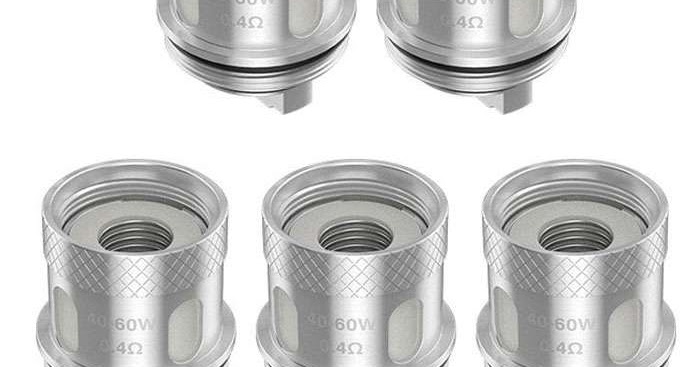
What is a vape coil?
The vape coil is an essential component of the vaping device, tasked with releasing flavorful, dense clouds. It usually consists of a wire and a wick and is mostly housed within the mod’s cartridge. The wick soaks up the e-juice and the coil, drawing power from the vape mod batteries, heats it to produce inhalable vapor.
How often should I change my vape coils?
If I were to provide an educated guess, a light vaper can go without changing a vape coil for a month. Meanwhile, a passionate vaper will need to change his/her coils every one to two weeks.
What happens if you burn your vape coil?
A worn-out or burnt vape coil can cause dry hits, low vapor production, and weak flavored hits. In worst cases, it can even give a hideous mixed taste of different flavors when you switch e-juices. So, check your coils regularly and replace them when the situation demands it.
Why is my vape leaking?
Leaking Vape Device. Using an old, worn-out coil can result in a leaking vape device. Of course, the leaks can be caused by other factors such as an overly filled tank, worn-out O-rings, or a wrongly filled e-juice. However, a worn-out coil is just as susceptible to causing the leaks.
Why does my vape make a gurgling sound?
However, do realize that the vape device usually produces a repulsive gurgling sound when the coil fails to perform its task properly. If the sound doesn’t fade away even after replacing the coil, it could be a sign that a bigger issue persists in your device. Simply put, a vaping device shouldn’t be making gurgling sounds.
Can you clean coils before you start cleaning?
If you want your coil to last a little longer, consider cleaning it. Unfortunately, not all coils can be cleaned, so check your device before you start any cleaning task. 2. Hollow Bubbling Sounds.
Can you discard coils before expiration?
You might be discar ding coils way too soon, long before their expiry date, or be using them beyond their effectiveness. Either way, you’d be either spending money on new coils far too often than necessary or buying new mods because of the destruction inflicted upon your vape mod by worn-out coils.
