
Step By Step Guide To Prime Coils
- Thread the new coil into the base of the tank
- Place several drops of e-liquid into the top of the coil directly into the cotton wick
- Place a couple of drop of e-liquid into the cotton that you can see through the juice ports
- Assemble the vape tank
- Fill the vape tank with vape liquid
- Wait 10 minutes to allow the wick to become fully saturated
How to make a homemade vape coil?
Supplies to wrap a vape coil
- Wire: any of the vaping wires would do.
- Flush cutters: wire cutters that can cut close in small spaces
- Ceramic tweezers: to pinch your coils while pulsing
- Fine tip tweezers: to fluff your cotton and place it inside the wick ports
- Small metal rod: a small screwdriver, or coiling tool
- Organic cotton: or whichever wicking material you prefer
What is the best coil for vaping?
Top 6 Best Premade Coils for Flavor – Our Reviews:
- Alien Coil. The Alien is a popular coil as a result of its features that provide easy vaping and a pleasant flavor.
- Tiger Coil. The Tiger coil is a premade coil that is created from using a 30 gauge Kanthal and a 0.8mm ribbon wire.
- Framed Staple Coil. ...
- Hive Coil. ...
- The Flat Bastard Coil. ...
- Tidal Wire Coil. ...
How to properly prime a coil?
To properly prime your coil you’re going to need your tank, your atomizer head (coil), and your eliquid of choice. It’s important to prime your coil so that you don’t get any dry hits, or end up burning your cotton. Once you’ve burnt the cotton in your coil you’re going to get that burnt, nasty taste every time that you take a draw.
How to know when to change vape coil?
Vape Replacement Coils: How & When To Replace Them (5 Step Guide)
- Replacing Your Cartomizer. As aforementioned, most cartomizers are disposable, which makes replacing them very simple. ...
- Replacing Your Multiple Coil Atomizer. Multiple coil atomizers are great for those seeking a lavish, extra-indulgent vape experience. ...
- Replacing Your Top Coil Clearomizer. ...
- Replacing Your Bottom Coil Clearomizer. ...
What does it mean to prime a vape coil?
In short, priming an atomizer coil simply means to pre-saturate the wicking material with e-liquid prior to first using it. This moisture will prevent the wicking material from overheating and burning. It also allows the wick to more fluidly and uniformly absorb the e-liquid from the tank and deliver it to the coil.
How do you break in a new coil?
Here is how to make coils last longer by breaking them in gradually:When you start vaping, set the wattage to the lowest recommended setting.Take a few short vapes to slowly start to break in the coil.Increase the power by 5 watts.Take three normal vapes and increase power by 5 watts.More items...•
Is priming a coil necessary?
Priming your coil basically means ensuring it is thoroughly soaked with e-liquid before you start to vape. The process of priming is intended to prevent “dry hits” when you first install a new coil, and for this reason it's only really necessary when you're using a brand new coil.
What happens if I dont Prime my coil?
What if I didn't prime my coil and it's burnt? Unfortunately, if you didn't prime your atomizer / coil properly and your wicking material is burnt, there is no way to bring it back. That taste will stay until you change your atomizer head containing a new coil.
How long does it take to prime a coil?
around 5-10 minutesIt's always recommended to leave your coil to prime for as long as possible - anywhere between 5-30 minutes. The longer you leave it the better, but most coils should be ready to vape after around 5-10 minutes.
How long does a new coil need to soak?
– 10 minutesIt is a simple process and can save you burning your coil and wick when you first install your new atomizer. Simply add a few drops of e-liquid onto the wicking material of your atomizer head before you install it into your tank. Then after filling your tank leave it to soak for 5 – 10 minutes.
How many puffs Should a coil last?
On average, a decently constructed coil for a sub-ohm tank should last you 4 days to 1 week. If you vape less because you cannot vape during work hours, or you do not vape throughout the day, then your coils are likely to last twice as long.
Can a burnt coil make you sick?
Depending on how bad the coil is burnt, you could end up choking or vomiting immediately. Depending on what kind of coil you are using they can produce some particles that stick to the vapor and end up ingested by the user when they are burned dry. Some have an allergy to these particles being created.
How do you prime a coil pod?
How to prime a coil for refillable podsFill the pod with the e-liquid of choice.Attach the refillable pod to the pod device and let it sit for 10 minutes.Inhale on the pod with no power, this helps push the e-liquid into the wicking channels to ensure the wick is fully saturated.Start vaping!
Why is my vape burning my throat with new coil?
Some vapers are quick to blame it on a faulty coil, but new coils usually get burnt because they haven't been primed before use. By priming your coil, we basically mean preparing it and getting the wick nice and saturated with e-juice.
Why does my vape crackle?
When inhaling on your device, vape juice is drawn into the coil. It is then the coils job to heat up the e-liquid and turn it into vapour. Like with most liquid when it is heated rapidly it will make a crackling noise as it turns into vapour.
Why is my coil burning after 1 day?
That burnt taste can occur if there's not enough e-liquid on the wick inside your atomizer coil. The wick is the part of your device that soaks up the e-liquid, which is then turned into vapour when the coil heats up.
You Need to Replace the Coil Because of Coil Gunk
Are you getting a flavor that tastes a bit like overcooked sugar when you vape? That’s a sure sign of coil gunk, the residue that builds up on your vape coil when you use vape juice that’s heavily sweetened with sucralose. You can confirm that your coil is gunky just by looking at it.
You Need to Replace the Coil Because of a Burned Wick
Are you getting a flavor that tastes like smoke in an extremely unpleasant way? That’s a sign of a burned wick. Some people have described the flavor of a burned wick as tasting a bit like vaping an old t-shirt.
Step 1: Discard Old Coil
Take off the tank and discard your old atomizer coil. Prior to priming or “breaking” in your new coil, you can also clean the other parts of your vape. Simply running these components under water and allowing them to air-dry will do the trick. Or, you can just simply wipe around the top and edges with a dry cloth.
Step 2: Attach New Coil
Connect and screw on the new coil. One common issue found with vapers is a leaking coil causing e-liquid to spill and waste. Make sure you line up your coil correctly and secure it properly. Also, the new coil allows you to get some leverage and avoid getting e-juice on your fingers as you prime up your atomizer.
Step 3: Moisten The Wick
The next part is to locate your juice holes. Depending on your atomizer coil, the cotton may be exposed behind the wick, while other coils have cotton exposed at the side of the wick.
Step 4: Reassemble Your Vape And Dry Pull
Now you’re ready to prime your coil by taking several pulls. Reassemble your tank and attach it to the battery. During this process, you will be taking several small hits and gradually without activating the fire button. Make sure your tank airflow is closed, so that you aren’t flooding the coil.
Step 5: Breaking In The Wire
Finally, you are breaking in the wire by turning your vape on a lower setting. You can take several hits and increase the power supply until you reach your preferred power setting. The reason you’re breaking in the wire is to allow for proper heating expansion.
Overall Taste Quality
You won’t have to worry about the burnt and bitter tastes that come from a charred wick or burnt cotton. When you take the time to prime your coil, the cotton is fully saturated, which means that the juice is properly flowing from the tank to the coil.
Long Coil Life
While coils are something you have to replace every so often with vaping, you’ll get a much longer shelf life because you’ve properly balanced your coil along with the wick. This is an obvious reason to take the time to prime your coils.
How to prime a vape coil?
How to prime a new coil for tanks: 1 Grab the fresh coil out of the box 2 Drip a couple of drops of e-liquid on the wicking holes and inside the coil head 3 Reassemble the vape tank and fill it with your choice of vape juice 4 Screw the tank on your vaping device and set it aside for at least 10 minutes 5 After the 10 minutes, inhale on the drip tip of the tank without firing 6 Adjust the wattage on your vape mod to the lowest recommended wattage resistance then hold on the fire button slowly and inhale 7 Gradually increase your wattage setting until you find your optimal range
Why is it important to take time to prep and prime your new vape coil?
It's important to take time to prep and prime your new vape coil to make sure that you are getting the most out of it and not burning it straight out of the box. Learn more about the reasons why your coils burn out to ensure you never lose a coil again!
How to increase wattage of vape mod?
Adjust the wattage on your vape mod to the lowest recommended wattage resistance then hold on the fire button slowly and inhale. Gradually increase your wattage setting until you find your optimal range. Once coil life is done then throw the old coil away and repeat this process again!
Why does my vape get burnt?
One reason this happens is if the coil is not primed properly and it is dry . When the vape device is fired and used at a high wattage it will heat up dry cotton and gives the vaper a burnt or dry hit.
How long to inhale e-liquid?
Screw the tank on your vaping device and set it aside for at least 10 minutes. After the 10 minutes, inhale on the drip tip of the tank without firing.
Can you quit smoking with an e-cigarette?
E-cigarettes have helped many people quit smoking. Most e-cigarette devices are easy to use and are beginner-friendly, but technical issues can still happen! All tank users and even rebuildable users have experienced a burnt taste after installing a brand new coil. In order to avoid a burnt vape, make sure the atomizer coils is primed correctly!
Why do you need to prime your coil?
Imagine you’ve got a kitchen sponge—one that’s so dry that a drop of water would take several seconds to be absorbed.
Can you over-prime your coil?
While you can obviously under-do it when it comes to priming your coil, you can also overdo it.
Step 1: Drip Drip!
First, take your new coil out of the packaging, and open the bottle of E-Liquid you plan on filling your tank or pod with.
Step 3 (Optional): Pull on it!
This step is optional—but if you want to speed up the priming process, or if you’re having trouble getting your wicking material to saturate just by simply letting it sit in the juice, you can try this step on top of the previous steps.
Summary: No More Burnt Coils!
So, now you know the three basic steps it takes to prime your coil.
HOW TO PRIME A COIL
Ok, so let’s assume you’ve been vaping the coil that came installed with your tank. Everything’s great, but you’ve noticed a drop in flavor and vapor production and you’ve decided it’s time to change the coil.
HOW LONG SHOULD A COIL LAST?
It’s impossible to say exactly how long a coil will last before you need to clean it (more on this later!) or replace it. It depends on how you vape, what type of e-juice you’re vaping and what wattage you vape at.
HOW DO I KNOW IF MY COIL NEEDS REPLACING?
If you’re asking yourself this question, you probably don’t need to change your coil just yet. It’s usually pretty obvious when the coil needs replacing, for one of several reasons:
HOW CAN I MAKE MY COIL LAST LONGER?
So now you know how to prime a coil and what to look out for when it might be time to change your coil… But is there anything you can do to make your coil last longer?…
HOW TO CLEAN A COIL
Now we’re going to take a look at the process of cleaning a used coil. You can’t beat a fresh coil for flavor and vapor production. But if your coil/wick isn’t too burnt and you’re in a pinch, just follow the below steps.
How to prime a coil vape?
Generally, to prime a coil vapers manually soak the wick – from both the opening in the top and the windows around the side – prior to filling up, and then leave the tank to sit for a short period of time before starting to vape.
Why do you need to prim your coil?
Priming your coil basically means ensuring it is thoroughly soaked with e-liquid before you start to vape. The process of priming is intended to prevent “dry hits” when you first install a new coil, and for this reason it’s only really necessary when you’re using a brand new coil. The wick (usually made from cotton) is completely dry ...
What does it mean to look after your coils?
Looking after your coils not only helps you enjoy your vaping experience, it also helps you get the most out of every coil. One often-mentioned tip for looking after your coils, especially for new vapers just getting to grips with sub ohm tanks, is to “prime” your coils before starting to vape. But what does it mean to prime your coil? ...
How to get e juice out of a bottle?
Use the dripper spout of your bottle or the glass dripper top to direct the e-juice directly to your wick, and add e-juice bit by bit so you don’t go too far. Continue until all the wick you can see is soaked in e-juice. If you end up with some pooling in the chamber, you can shake any excess out onto a paper towel.
What happens if you vape with pooling?
If you end up with some pooling in the chamber, you can shake any excess out onto a paper towel. If you still have pooling when you try to vape later on, you’ll end up with a gurgling noise and possibly some juice getting sucked up into your mouth through the mouthpiece.
Where is the coil on a new atomizer?
Almost all atomizer heads have an opening in the top. When the coil is brand new, you may be able to see the coil in the center if you look down into it from the top, but you will certainly be able to see the white cotton wrapped around the inside of the chamber.
Do you need to soak cotton wick before vaping?
Even without instruction, remembering that you need to make sure the cotton wick is completely soaked in e-liquid before you start vaping should be enough to prevent any disasters. However, there are many specific steps in most vapers’ priming process, and you can follow it through to get your coils perfectly primed, every time.
What happens if you don't prime your vape coil?
If a coil is not properly primed, the first vape could potentially fry the coil and for sure get an unpleasant burnt tasting vape. In addition, the coil will likely be ruined and require replacement. Ruining a new vape coil on the first vape equates to money down the drain.
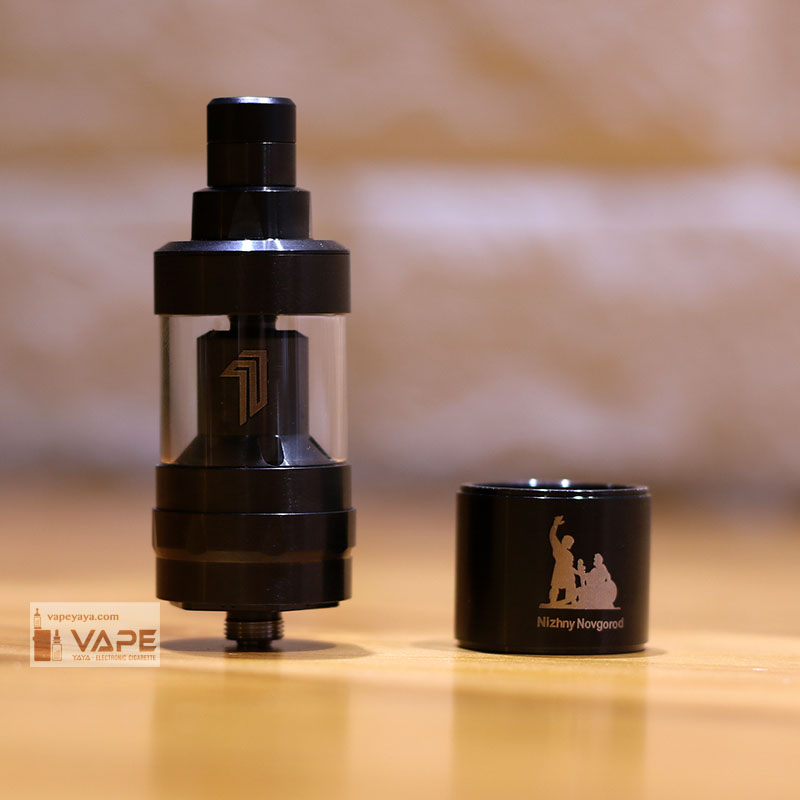
What is a vape coil?
A vape coil is a cylindrical device that contains the atomizer wire and wick in one piece. The atomizer coil itself is made of metal. The most common type of metal used is Kanthal. Although other metals such as stainless steel or nickel are used for temperature control vaping. The metal coil resembles a coiled spring.
What is the best vape tank?
The best quality vape tanks, found at Mig Vapor, are precision engineered and the coils thread easily into place. Once the coil is inserted, place a couple of drops of e-liquid through the top opening of the coil directly on to the cotton material.
What is the resistance of a vape coil?
The most common types of vape coils are: Sub ohm vape coils – atomizer resistance is less than 1.0 ohms.
How to prime a sub ohm coil?
To prime a sub ohm atomizer coil, the first thing to do is insert the new coil into the base of the vape tank. The best quality vape tanks, found at Mig Vapor, are precision engineered and the coils thread easily into place.
Why is vape wick saturated?
First, the vape wick replacement is saturated to avoid a burnt taste or cause coil damage. Next, the coil life is extended. Overall, coil life will be affected by how much you vape and the wattage. The idea is to get the most coil life you can because that’s money!
What is the wick on an atomizer made of?
As you can see in the image above the atomizer coil is surrounded by wick. The wick is usually made of organic cotton although other fibers such as bamboo can also be used. The coil and wick are in direct contact. If the wick is dry and the coil is heated, the cotton will burn.
How to Prep New Coils for Vaping
Okay, so I covered why you should do it, but now let’s jump to the practical part. Priming your coils isn’t an exact science but you can mess it up pretty fast if you are not careful.
How To Prepare MTL Vape Coils
Mouth-to-lung coils are specific because they have resistances higher than 1.0 ohms. They are very popular with former smokers since they mimic the process of smoking regular cigarettes. If you decided to start vaping not so long ago, and are currently transitioning from heavy smoking I highly suggest starting off with an MTL device.
Prime Your Coils & Vape Like a Boss
And there you have it — everything that you need to know about priming your coils… and then some.
How long should I let my vape tank sit?
In order to make sure everything works perfectly from the first draw, I’ll let the tank sit with vape juice in it for 10-15 minutes – this takes care of any dry spots on the coil you might have missed. Once the 15 minutes are up, start vaping at a low wattage, then gradually build up until you hit your sweet spot.
When do you get dry hits on a coil?
Dry hits tend to happen most when a coil is new (or when it’s completely burnt out after a week or two of use), so it is important to really focus on getting as much juice onto the coil before installing it in your tank. I use a tissue to do this.
Why do my coils die out?
Cheap vape juice, or vape juice with tons of additives, is the #1 reason why coils die out too early. Once you have correctly primed your mesh coils, the cotton will be totally saturated and stop and potential dry hits.
Why do sub ohm tanks use mesh coils?
You just need to ensure that the cotton inside the coil head is completely saturated before you take a hit .
How to fill a wicker tank with E juice?
Grab your juice bottle. Slowly drip E Juice through the mesh (at the top) and onto the cotton. Do a few drops, then wait. Check the wicking holes on the side, they should be saturated with juice. If they’re not, keep dripping E Juice until they are. Once your coil is properly primed, seal the tank up and fill her up with E Juice.
How long does a mesh coil last?
A mesh coil, on average, will usually last about 30-50% longer than a standard, wire coil. This is why they were invented.
Is mesh coil better than wire?
Mesh coils are A LOT better than the standard wire-based coils you’re used to. For starters, mesh coils have way more surface area to them and this allows for better saturation and more even heating. This to attributes combined makes the vape more flavorful and smooth.
