Step 1: Open the Tank
- Open the Refill Hatch. If there is a fill latch on top of your vape, between the tank and the drip tip, flip this open...
- Unscrew the Top. If there is no access hatch, your vape may be designed to fill with the top removed. Twist off the drip...
- Remove the Bottom. If your vape is a bottom fill rig, then you will need to flip the entire tank head...
How to fill a vape tank?
The first step is to get your tank open and prepare to fill it. If there is a fill latch on top of your vape, between the tank and the drip tip, flip this open now. Use force if there is a button, but do not wrench it too far open. Usually, these swivel a certain distance, then stop.
How to set up a vape?
How to set up a Vape. 1 Step 1 - Prepare your device. Remove your device from the box and place it on a flat surface in front of you. 2 Step 2 - Fill your tank or pod with e-liquid. 3 Step 3 - Prime your coil / pod. 4 Step 4 - Settings or no Settings? 5 Step 5 - Set the correct output power. More items
How to use a drip tip vape?
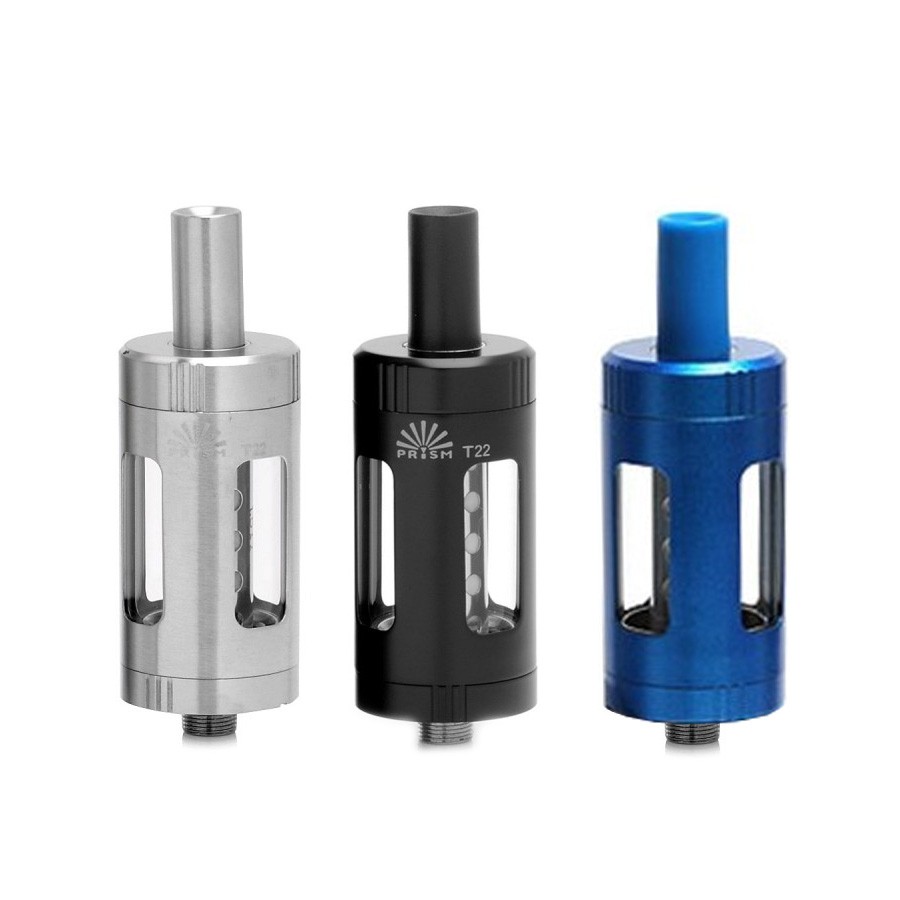
Twist off the drip tip top of the vape pen until you find where you can load the tank. Look for the plastic ring with the oval opening. If your vape is a bottom fill rig, then you will need to flip the entire tank head upside down. Then remove both the coil and the bottom of the rig until you can access the open and waiting tank.
Should you buy pre-made coils for your vape tank?
If you’re new to vaping, chances are you’re using a sub-ohm tank with pre-made coils. This is fine. I still vape using pre-made coils every now and then, as it can be more convenient. Still, not all coils are created equally; some brand’s coils are A LOT better than others.
How do I prepare my vape?
0:451:52Priming a vape coil in 2 minutes - YouTubeYouTubeStart of suggested clipEnd of suggested clipGet your either quid. And add a drop onto each of the liquid inlet holes add a few drops onto theMoreGet your either quid. And add a drop onto each of the liquid inlet holes add a few drops onto the wicking material down the middle hole put your vape coil in your tank fill your tank with the liquid.
How do you sterilize a vape tank?
The Deep Clean - Cleaning Vape Tank with Alcohol Dampen a cloth or paper towel with the vodka and scrub any tough areas until the tank is completely clean. Wipe and rinse with warm water. Let stand and air dry for 10-15 minutes. Reassemble tank and device.
How do I clean my new vape tank for flavor?
0:152:21How To Clean Your Vape Tank - YouTubeYouTubeStart of suggested clipEnd of suggested clipThe tank gently with warm water and with a little bit of soap. Read the instructions in the manualMoreThe tank gently with warm water and with a little bit of soap. Read the instructions in the manual to make sure you can use something other than just warm water take a cotton swab.
Should you clean a new vape tank?
To be honest, if you want to get the best taste of this new vape juice then you should clean the vape tank. Cleaning your tank out will remove the residue from your old juice and keep each puff tasting fresh.
Can I rinse my vape tank with water?
Water is a great way to wash off some of that old gunk and congealed e-liquid that's polluting your vapour. First, you'll need to empty your tank if it isn't already. Then, you'll need to fill up a bowl or cup with warm water (or microwave it).
Can I put water in my vape tank?
The answer to this question is no, you will not be able to make cool clouds and shapes with the vapor that comes out of the vape pen. The reason for this is that the vapor that comes out when you put just water in the vape will cool much too fast to produce large clouds, or sometimes any visual vapor at all.
Can I leave juice in my vape overnight?
Always store the vape with an empty tank, or store it with the mouthpiece upright to avoid leaking, and try to avoid storing it with liquid in the tank for long periods of time, as it could change the flavor. If you are a flavor chaser, you should avoid leaving vape juice in your tank for very long without use.
How often should you clean a vape tank?
Signs It's Time to Clean the Vape Tank For heavy vapers, it's best to clean your vape tank once a week with a quick rinse. For moderate vapers, clean at least once every two weeks. This is about the same frequency that experts recommend replacing the coil, about every two weeks.
How long can e-juice stay in tank?
You should realistically not leave the juice for more than 5 days. At this point, it will usually have been too long and start to taste awful. If you leave a tank un-vaped for too long, the coil floods and starts to leak.
How long do vape coils last?
between 7 to 21 daysWhile the exact duration may differ from person to person depending on their personal vaping habits, most new coils are designed to last anywhere between 7 to 21 days. This varies depending on how well you care for and clean your device.
Can you clean a burnt coil?
So, carefully remove the coil from the hot water and submerge it in the cold water. With this, any remaining debris will fall off, and your coil will be clean again. If you have done this and still experience the annoying burnt taste vape, then you can clean it using vinegar or lemon juice in hot water.
Can you wash vape coils?
Here is how you should clean your replaceable coils: Let your coil soak in ethanol, vinegar, or cheap vodka for at least a couple of hours. Place it under the tap and rinse. Rinse once more with some distilled water.
How to take a vaporizer apart?
The first step is to take your vaporizer apart precisely, while remembering what goes where for later. Unscrew the mouthpiece and the airflow base at the bottom of your device to reveal the coil.
How long should I let my e-liquid settle?
Step 5: Let your e-liquid settle. When everything’s back in place, it’s always best to allow your e-liquid to ‘steep’ inside your tank for 5 minutes. Your coil will then be primed to deliver a supreme vaping experience with optimum flavour.
How to know if a vape is easier to refill?
Any vape is easier to refill when you know how it opens and how it is meant to be loaded. Take a close look at the tank and examine the pieces.
How to fill a vape with no access hatch?
If there is no access hatch, your vape may be designed to fill with the top removed. Twist off the drip tip top of the vape pen until you find where you can load the tank. Look for the plastic ring with the oval opening.
What is the oval opening on a unicorn vape?
The oval opening in top fill vapes is designed to direct your unicorn tip to the correct place. But even without it, all you have to do is try to get the liquid to flow down the side of the glass. Be careful not to over-fill your vape. Many tanks have fill lines. If yours doesn't, stop before the tank is 3/4 full.
How to tell if a tank is top or bottom filler?
Often, you can tell a top filler because between the drip-tip and the tank will be a plastic ring layer with an oval opening, that oval is where the tank would like you to fill it. Bottom fill tanks are becoming more common and will need to be flipped upside down to load.
Do you need to dump out e-liquid?
If the remainder is fresh and you want to mix flavors, however, the dump-out is not necessary.
Do you have to be a first time vaper to use a vape tank?
April 19, 2019. You don't have to be a first-time vaper to be completely stumped by a vape tank. To be frank, vape tanks come in all shapes, sizes, and designs. Some open from the top, some open from the bottom, and some are weirdly unique to their model.
How long should I let my vape sit?
Let it breathe: Let the reassembled vape be sit there for around 2-3 minutes for the coil to be saturated. The best of the flavour tastes amazing with the saturated coil and help protect against dry hits. Getting the most out of the filled flavour is one of the only ways you are going to enjoy it.
What does vaping see?
Vapers love seeing the clouds of flavoured e-liquids. When that fills the thin stick of the machine and then seen blown out from the mouth, filling the air with dense cloud and watched as it melts into the atmosphere; the entire sight is more than euphoric. The flavour makes things even better.
When to charge vape?
For most users charging a vape coincides with charging their smartphone so a good habit to get into is to charge your vape every night when you go to bed next to your smartphone. It is always recommended to use the allocated USB charging cable that came with your device.
What are the different types of vapes?
There are 2 types of vapes; fixed powered devices and variable powered devices. This refers to the ability to adjust the power settings and fine-tune the vape experience. If you have a pod system its likely type 1, but read through both types below to make sure before proceeding.
Why do you let your tank sit?
By letting your tank sit you are making sure the cotton is truly soaked with e-liquid to prevent a dry hit and potentially burning the coil. Prime your coil: A popular method for helping the e-liquid soak through is priming. This gives you extra reassurance that you won't get that nasty dry hit.
How long should I let my pod sit before using it?
This is an important step to get the optimum flavour and experience. Let your tank or pod sit for 5 minutes before you first use it.….yes I know you feel like you have waited long enough…but trust me it will pay off.
How to Prep New Coils for Vaping
Okay, so I covered why you should do it, but now let’s jump to the practical part. Priming your coils isn’t an exact science but you can mess it up pretty fast if you are not careful.
How To Prepare MTL Vape Coils
Mouth-to-lung coils are specific because they have resistances higher than 1.0 ohms. They are very popular with former smokers since they mimic the process of smoking regular cigarettes. If you decided to start vaping not so long ago, and are currently transitioning from heavy smoking I highly suggest starting off with an MTL device.
Prime Your Coils & Vape Like a Boss
And there you have it — everything that you need to know about priming your coils… and then some.
How To Wick Your RDA – Use The Right Cotton
This kind of goes without saying, but if you’re new to building your own coils you should 100% invest in decent, organic cotton – not the crap that some tank makers include in their boxes.
Using The Right Amount of Cotton
This is VERY important and it is something that took me a long time to figure out.
The Scottish Roll Wicking Technique
If you’re a beginner just finding your feet, it is definitely worth learning The Scottish Roll Wicking Technique.
Wicking 101 – Keep Your Hands Clean
Simple: if you’re building a new coil, wash your hands. You don’t want any crap – literally or figuratively – on them when you’re wicking, as it will compromise the cotton and, potentially, the flavor and overall performance of your build.
Wicking 101 – The CheeseBanana Wicking Technique
The name might sound odd, but this wicking technique – basically, a great example of the Scottish Roll Wicking technique – demoed by a dude from Edinburgh that goes by the name of CheeseBanana has helped untold numbers of vapers get their heads around wicking.
Wicking 101 – Burn Off Juice Build Up On Coils
If you’re changing out the cotton in your RDA or RDTA, make sure you burn off all that gross gunk on the coils themselves.
Wicking 101 – Clean Your Gear
To get optimum performance from your tank, you need to clean it regularly. Simple, I know, but so many people DO NOT do this and then complain when things stop working properly.