
Take a bottle of e-liquid and place a bit of juice on each of the coil’s wick openings until you no longer see dry cotton. Reassemble and fill the tank. Wait several minutes before vaping to ensure that the cotton is completely soaked.

How to change vape juice in your tank?
When you are changing vape juice in a vape tank, it is a good idea to rinse out the tank with warm water. You don’t want the water to get into the base of the tank so make sure to separate the tank components and just rinse out the glass part! After rinsing, dab it dry with some paper towel.
How to clean a vape juice maker?
Soak overnight and then use a water rinse to get rid of residual traces of alcohol. A deep clean ensures that your vape juices taste good and will prevent build-up from getting worse. That done, wipe the fill tank with a cloth, and use your cotton swabs to dry out the deep corners.
How to clean a vape fill tank?
A deep clean ensures that your vape juices taste good and will prevent build-up from getting worse. That done, wipe the fill tank with a cloth, and use your cotton swabs to dry out the deep corners. Take care not to leave cotton lint inside.
How to change vape juice with an RTA?
How to change vape juice with an RTA or RBA is the same as an RDA. Take out the existing cotton and set your mod to 15 watts to burn off any residual e-juice. Wait 15 minutes for the atomizer and base to cool. Remove the atomizer base from your vape mod and insert a new strip of fresh cotton wick.
How do you fill a vape tank for the first time?
0:102:03How to Fill Vape Tanks - YouTubeYouTubeStart of suggested clipEnd of suggested clipSimply twist the top insert. The tip of your liquor bottle into the hole and squeeze.MoreSimply twist the top insert. The tip of your liquor bottle into the hole and squeeze.
How do you pre prime a vape cartridge?
How to Prime Your CoilStep 1: Wet the Cotton Through the Top of the Atomizer Head.Step 2: Wet the Cotton Visible Through the Wicking Ports.Step 3: Assemble and Fill Up the Tank.Step 4: Take Some Dry Pulls.Step 5: Have a Little Patience.Step 6: Start On a Lower Wattage.Never Forget to Prime.
How long should you let vape juice soak into a new coil?
It is a simple process and can save you burning your coil and wick when you first install your new atomizer. Simply add a few drops of e-liquid onto the wicking material of your atomizer head before you install it into your tank. Then after filling your tank leave it to soak for 5 – 10 minutes.
Is priming a coil necessary?
Arguably the most important reason to prime the atomizer's coil is that it prolongs its life. Priming coils essentially ensures that the wick is “broken in” from the first draw, drastically reducing the likelihood of burnt hits.
How do you break in a new coil?
Here is how to make coils last longer by breaking them in gradually:When you start vaping, set the wattage to the lowest recommended setting.Take a few short vapes to slowly start to break in the coil.Increase the power by 5 watts.Take three normal vapes and increase power by 5 watts.More items...•
Can you change coil with juice in tank?
If there is any vape juice still in your tank, dump it out in your trash can. This way, you can replace it with fresh juice after you put on a fresh coil. It is helpful to replace your coil with as little vape juice remaining as possible.
Why is my vape burning my throat with new coil?
Some vapers are quick to blame it on a faulty coil, but new coils usually get burnt because they haven't been primed before use. By priming your coil, we basically mean preparing it and getting the wick nice and saturated with e-juice.
How long should I wait between vape hits?
15 to 30 secondsDon't Chain Vape You must let your wicks saturate to reduce the possibility of a dry hit. The general rule is to wait 15 to 30 seconds before puffing again. For people who are trying to quit smoking, 30 seconds can be a long wait. In this case, you can buy e-juice with a higher nicotine level.
Why am I going through coils so fast?
If the user vapes very regularly, the coil will quickly dry out in patches, or completely. When this occurs, it will often burn out. Many vapers unknowingly use the wrong e-liquid with the wrong type of device, leading to frustration when their coils keep burning without clear reason.
How do you pre coil?
To prime a new coil, simply fill your tank with e liquid and leave it to stand for a few minutes before vaping. As above, this will allow the cotton inside your new coil to absorb plenty of e-liquid ready for that first, tasty vape.
What happens if you don't prime a coil?
What if I didn't prime my coil and it's burnt? Unfortunately, if you didn't prime your atomizer / coil properly and your wicking material is burnt, there is no way to bring it back. That taste will stay until you change your atomizer head containing a new coil.
Does chain vaping burnt coil?
This shouldn't be needed (since you already soaked the wick), but if you don't prime your coil properly the whole thing can get ruined, so it's worth being absolutely sure. “Chain vaping” – just vaping and vaping continuously until you can't see your e-cig for all the clouds – can lead to a burnt wick too.
How long to cool a vape mod?
Take out the existing cotton and set your mod to 15 watts to burn off any residual e-juice. Wait 15 minutes for the atomizer and base to cool. Remove the atomizer base from your vape mod and insert a new strip of fresh cotton wick. Before assembling the RTA cap or vape tank, rinse out the cap or tank with warm water.
How to change vape juice in RDA coil?
How to change vape juice in an RDA is really easy. All you need to do is swap out the cotton. Before changing vape juice in a RDA coil build, you have to get rid of the old cotton wick. The former flavor will still be there and mix with the new vape juice unless you totally get rid of the old wick. When you pull out the old wick, you will notice ...
What is an RDA atomizer?
An RDA is a rebuildable drip atomizer. This is a vape device with an atomizer deck to build your own coils on. There is no tank that contains a reservoir e-liquid. Instead, e-liquid is dripped directly onto the wick and atomizer as needed. After every few vapes you drip on some new e-juice. It seems like a hassle to always be dripping new vape juice onto the atomizer but dripper's love it.
Do you taste the old flavor of vape juice?
The new flavor will be prominent but you will taste traces of the old flavor. The old flavor should fade away after a while but the residual taste of the previous vape juice flavor may remain for the duration of the coil's lifespan. If you don’t want any trace of the previous flavor, you will need to swap coils and rinse out ...
How to take a vaporizer apart?
The first step is to take your vaporizer apart precisely, while remembering what goes where for later. Unscrew the mouthpiece and the airflow base at the bottom of your device to reveal the coil.
How long should I let my e-liquid settle?
Step 5: Let your e-liquid settle. When everything’s back in place, it’s always best to allow your e-liquid to ‘steep’ inside your tank for 5 minutes. Your coil will then be primed to deliver a supreme vaping experience with optimum flavour.
What are rebuildable tanks?
A vape tank is a very important part of your kit. Different ones work with various atomisers, either pre made or rebuildables, which can determine flavour and cloud.
How do rebuildable tanks work?
A vape tank on an RTA and RTDA is like a reservoir for the coil. The coil cannot work without the tank and the tank cannot work without the coil. They’re a team.
How to choose a rebuildable
The best way to choose a rebuildable is to decide what you want from your vape experience. You need to consider whether you want to drip each time you have a few puffs, or whether you want to have a reservoir that feeds eliquid to the coil.
Is my rebuildable compatible with my mod?
You need to make sure that your rebuildable is compatible with your device. You don’t have to stick with the same brand as your mod, it just needs to be the right connection and to have enough power for your coil. The majority of tanks are a 510 pin, which should fit on most mods.
How much of your vape tank should I fill?
Once the tank and coils are dried completely, proceed with filling it with the new e-juice that you are excited about. For optimal results, fill only 3/4 of your tank to avoid a leaking vape .
Is it hard to change vape juice?
The process of changing your vape juice is not difficult but it needs all your attention. Once you do it a couple of times, you will soon become a pro at it.
Can you change vape juice multiple times?
If you are a passionate vaper who likes switching flavors frequently, I strongly recommend that you keep multiple tanks filled with your favorite e-liquids so you don’t have to change the vape juice multiple times.
How to disassemble a vape tank?
In most cases, disassembling a vape tank is a simple task that you can perform in a matter of seconds. Simply grip the tank’s top hardware and bottom hardware in opposite hands and twist counterclockwise to loosen the threads. After you’ve unscrewed the tank, you’ll have two halves: the bottom hardware with the atomizer coil attached and ...
How to remove glass from a vape?
To remove the glass, wiggle it gently to slide it off of the silicone or rubber o-ring holding it in place. To remove the mouthpiece, lift it straight up to pop it out of its socket. Many modern vape tanks have coils that screw into both the top and bottom hardware.
Why is my vape tank stubborn?
In some cases, a vape tank can simply be stubborn because the machining of the threads isn’t so good. That could be a sign that you’ve gotten a counterfeit tank, but it’s more likely just a case of subpar workmanship. Some vape manufacturers are better than others.
Why is my vape tank not moving?
One of the problems you might encounter when disassembling a vape tank is that the glass can sometimes be extremely stubborn. No matter how much you might wiggle the glass, it simply refuses to move. You don’t want to use tools or apply too much force in this case, because you’ll break the glass.
How to remove stuck glass from a tank?
Just get a length of dental floss and place it in the seam between the glass and the tank’s hardware. Hold the floss tight while wrapping it around the tank repeatedly.
About pre-filled tanks
Pre-filled tanks are essential to their respective vape pen or vape kit. Pre-filled tanks are easy to use and hassle-free, just pop them out of the package and into your device then you're good to go. Pre-filled tanks are generally specifically designed to be used with only their respective devices so be sure that you're getting the correct tank.
Pre-filled Tanks at Electric Tobacconist
Electric Tobacconist online vape shop has all the pre-filled tanks you're looking for. Electric Tobacconist accepts all major credit cards.
Did You Pre-Drip Your Wick
The most common reason for the dry hit blues on a fresh coil is simple. So simple in fact it will blow your mind. Most new vapers believe that putting e-liquid in the tank and waiting a minute will give the juice enough time to seep in and start vaping.
Is My Juice Too Thick For This
Look at the tank system you have in your hand, the PG/VG ratio of your e-liquid will play a pivotal role in whether or not you have a great vaping experience. When looking at a coil system, I have a simple rule: The smaller the holes, the higher the need for PG (Propylene Glycol).
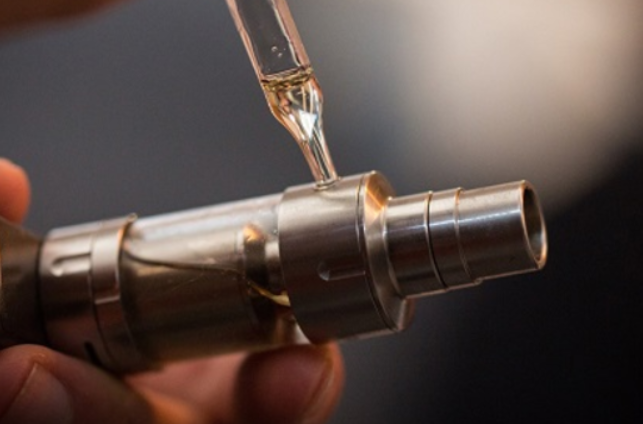
Aim The E-Liquid For The Side Wall
When you look down into any clearomizer you will see a post in the center with a hole in it. This is called the airflow channel and you do not want to put your e-liquid down it. The only thing you will achieve by getting e-liquid in there is a wet leg, so when filling your tank aim for the side wall made of glass or plastic.
What Do You Mean, There Is A Fill Line
If your tank has had a problem with leaking, aside from simple fixes like threads not being tightened properly – which we will get to in a minute – all clearomizer’s rely on vacuum pressure to keep the liquid from dropping out of the bottom.
Rubber Bits And Twisty Things
You should always pay attention to the gaskets and threads on your tank, and while you are filling it is a perfect time to glance over them. When using disposable or smaller clearomizers, if the rubber looks bad – with little tears and pieces missing – it is probably time to invest in something else.
Let It Warm Up First
Imagine getting into your vehicle, pushing the gas pedal to the floor and then starting the engine. Now sit there for the next 10 minutes without letting your foot move even slightly: my guess is you wouldn’t. Your tank is no different from the engine of your families automobile, you have to let it break in and warm up before giving it full power.
Conclusion
Six simple steps that will keep you from having a bad vaping experience, nothing overly complicated and now that you have read them, they seem like common sense. These simple steps are already being shown to people in a lot of vape shops, but as most vapers have never stepped inside one, this article is for them.
