The process of assembling a vape with an atomizer usually involves:
- Preparing your coil and securing it to the build back of your atomizer. ...
- Check out your coil resistance using an Ohm meter or a vapor mod that has a built-in ohm meter. ...
- Dry burn the coils to remove any hotspots along the coil surface. ...
- Let the coil sit aside after you know that it's burning evenly. ...
Full Answer
How often should you change the atomizer in your vape?
Oct 20, 2021 · You start by either assembling the atomizer if you build your own deck, or you open a box, take out your atomizer and screw it on your battery. Just like a mortal! So we common people who are not vape gods (those who wick their own coils and all that) take the atomizer out of its pack and are again faced with two options.
What to do when your vape says check atomizer?
Technically every vape pen in the world has some kind of atomizer in it, but when it is in a clearomizer, the wick absorbs juice from a tank rather than having to drip juice onto the wick yourself. The main advantage is the "ready to go" use, but these are much harder to make.
What does No atomizer mean on vape?
Jan 11, 2019 · Manually soak your wicks before installing them so that when they start to heat, there’s enough juice to absorb the heat to prevent the burning of your vape coil. Add a couple drops of e-juice to the top or side opening where the wick is visible, and allow the exposed wick to soak so that it is saturated and your coil is ready for use.
What is an atomiser on a vape?
Jun 22, 2020 · “Check Atomizer” or “No Atomizer” will appear when your vape mod or pod vape isn’t reading your coil correctly. This can be due to the 510 connector not reading properly (where the tank screws onto the mod), the coil not making proper contact inside of the tank, or possibly a …

Can you make your own atomizer?
As long as you have some patience and the right tools, you can build an atomizer every bit as good as one premade in a vape store or online.Jun 10, 2018
How do you make an atomizer?
0:264:33Make A Spray Atomiser In 5 Minutes (Very Basic Airbrush Effects)YouTubeStart of suggested clipEnd of suggested clipWell you can make a sprayer a little jar and a drinking straw. You can find a little jar like thisMoreWell you can make a sprayer a little jar and a drinking straw. You can find a little jar like this this one this jar came from pate.
How do you make a coil atomizer?
3:4711:11COIL BUILDING 101 - HOW TO MAKE VAPE COILS FOR BEGINNERSYouTubeStart of suggested clipEnd of suggested clipJust like that okay see how that's laying in there now at this point before you tighten down youMoreJust like that okay see how that's laying in there now at this point before you tighten down you might want to play with your coil placement. Hold it in place where you want it.
How do I fix my vape without atomizer?
RecapClean all contacts on battery/mod, tank or pod.Remove and reinstall the coil (after cleaning)Try a new coil.Check the 510 pin and see if you can adjust it (mods/tanks)Try another tank on your mod.Try another mod with your tank.Adjust base of coil carefully if you can (mainly sub-Ohm coils)
What can I use as an atomizer?
Some examples of atomizers include cooking sprays, medical inhalers, squirt bottles and perfume spray bottles. The atomizer is composed of several elements: the container that holds the liquid, the tube or straw that draws the liquid to the spray nozzle, and the spray nozzle.
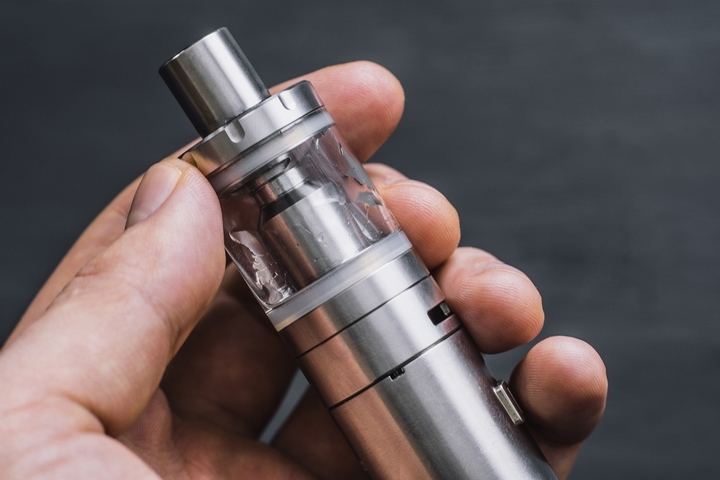
Where is the atomizer located in a vape?
Housed within the vape tank, an atomizer head contains a coil of thin wire and wicking material. We will go into the finer details a little bit later, but the atomizer creates vapour.
What do I need to build my own coils?
0:4410:47The Vape Coil Building Tutorial For Beginners - YouTubeYouTubeStart of suggested clipEnd of suggested clipSome tweezers preferably ceramic tipped needle nose pliers or forceps. Some small wire cutters orMoreSome tweezers preferably ceramic tipped needle nose pliers or forceps. Some small wire cutters or nail clippers wicking materials organic cotton silica Eco wool etc.
Can you build your own vape?
If you don't like what you can find in a store, or your budget doesn't match the device you want, you can literally go out and build your own vape.Dec 7, 2016
What wire is used for vape coils?
Kanthal, stainless steel, nichrome, nickel and titanium are the five types of vape wire used for coil building. Nickel and titanium are considered more advanced types of wire and are only usable in temperature control mode.Apr 1, 2022
What's no atomizer mean?
If you press the firing button on your e-cig and you see the message 'no atomizer' or 'check atomizer' it means that your vape mod is not reading the coil within your vape tank properly. It can be because of the 510 connection, the vape coil itself or the bits in between.Sep 9, 2020
Why does my vape pen say no atomizer?
“Check Atomizer” or “No Atomizer” will appear when your vape mod or pod vape isn't reading your coil correctly. This can be due to the 510 connector not reading properly (where the tank screws onto the mod), the coil not making proper contact inside of the tank, or possibly a short.Jun 22, 2020
How do I get my vape to work again?
Break Air Bubbles. If you have a pod-based disposable vape, you might get weak hits if air bubbles form around the pod's wicks. Tap the device gently on a table to break the air bubbles. After giving the wicks a few seconds to get wet, you should get some nice hits again.Jun 28, 2020
Step 1. Make the Holder
Remove the cap from the jar and make two holes on it, one for a screw and one for the shot glass. Be sure to mark the measurements for the set screw and the shot glass.
Step 3. Assemble
Take the nuts off from the screw, and then insert the screw into the smaller hole in your cap. Replace the nuts on both ends so that 1/3 of the screw is inside the cap and 2/3 of it is outside of the cap.
Step 4. Ensure Safety
Glass jars can be too heavy for your stand, and you might find yourself picking up pieces of broken glass on your floor if your vaporizer falls out of balance and the jars are knocked off.
1 min
Now, you finally feel ready to build up your own homemade vaporizer, but you’re hesitating because of all the fuss? Here we’re gonna help you avoid all the sharp edges. We don’t know how you came to this point but suppose, something like the following happened:
Safety
Provided that you use your homemade vaporizer with care and stick to the safety rules, you’ll love puffing vapes with your very own toy.
Posted by David Brown
Smoker for 20 years, switched to vaping 5 years ago. Never felt better since then. The best decision in my life. Proficient in DIY e-juices and custom coil builds. Vape collection - Wismec Noisy Cricket, SMOK Majesty Luxe, Augvape Druga, Dr.
What is the heating element of a vape?
2. The vape atomizer. The vape atomizer is the heating element of your vape. In other words it is the part. that heats up your e-juice and converts it into vapor. There are many different types of atomizers available that all deliver a different vaping experience.
What are the components of a vape pen?
Basic components to build your own vape pen. Vapes consist of two main components; a battery and an atomizer. Let’s examine these in more detail. 1. Selecting your vape battery. The vape battery is the most basic part of your vaping device. It provides the power and. therefore is essential heat source of your device. Batteries are available in.
Why is it important to choose the right battery for a vape?
Selecting the right battery is also vital to ensure the safety of your device. As with any electronic device, there is always a risk of it setting a light, and vapes are no different. Many people enjoy choosing their own vape batteries when customizing their devices in order to produce more power and bigger vapor clouds.
How many ohms does a vape coil have?
Regular vapes generally use coils with a resistance ranging between 1.5 Ohms to 2.8 Ohms.
How do atomizers work?
In an atomizer, you have the resistance wire coiled around a wick that is saturated and wet with the juice that you dripped on top of it. This happens in a small chamber and has an airflow source (a hole) under the coil.
Where can I buy Kanthal wire?
You can buy Nichrome or Kanthal wire (the most commonly used resistance wires) online in bulk or you can get them at a vape shop. If you can not obtain the wire these ways, take apart a toaster or a hair dryer and use that! The gauge (AWG) of the wire depends on your battery.
Is glycerin cheap?
Glycerin is very cheap so experiment! Mess up every once in a while until you get it perfect. As for flavoring, don't use extracts made with alcohol. It won't hurt you, but it won't taste like much. You can sometimes use imitation flavors, just read the ingredients and make sure alcohol isn't used.
Prime Your Vape Coil
Priming only takes a few minutes of your time and can result in a richer vaping quality and extend the lifespan of your coil. Failure to prime your coil can ruin and burn your coil at the first rip. Priming your coil is simple.
Use Lower Power Settings
Sub-ohm vape tanks are built to run on high-level power settings, but consistently vaping at a higher wattage will shorten the life of your coil and e-juice. If you choose to vape at a higher wattage, your e-juice that is absorbed by the wick burns off faster and vaporizes more quickly from the high level of heat, which wastes your e-juice.
Keep Your Tank Full
Low e-juice in your vape tank can keep the wick drier than needed for each vape session. Many coil heads need e-juice levels to remain at a minimum level to allow for the wick to come in contact with the juice for vaping.
Use E-Juice That Is More PG and Less VG
This is one of the best tips to make atomizer heads last longer. If you’re priming your vape pen and still getting dry puffs, your e-juice could be the problem. E-juice that is high VG – 70 percent or higher – can cause problems with your wick, the speed of wicking and the speed of vaporization.
What causes a check atomizer short?
Loose pieces of metal on the build deck will cause your mod to display “Check Atomizer” or “Atomizer Short”. Even very small pieces or trimmings of wire can cause a short or a check atomizer error on an RDA/RTA/RDTA. First, inspect the build deck closely for loose pieces of wire or other foreign objects.
Why does my mod read "Check Atomizer"?
Over time, dirt, dust, and ejuice can collect in your 510 connector and this can cause your mod to read Check Atomizer/No Atomizer. Start by removing the tank from the mod and inspect the threading where the tank screws in for dirt, dust, or ejuice. Do the same with the 510 connector on your mod.
What to do if cleaning contact points doesn't fix check atomizer error?
If cleaning the contact points doesn’t fix the check atomizer error on your pod vape, you’ll want to carefully examine the contact pins/plates on your pod vape and on your pod for damage.
What is a versed vaper?
The Versed Vaper team are a group of passionate and experienced vapers who take pride in writing helpful, quality content about vaping. From deals, to news and reviews, we've got you covered on all things vaping. Remember to subscribe to our newsletter, and follow us on Twitter, Instagram, and Facebook!
What happens if your RDA is too low?
If your build resistance on your RDA is too low some mods will deliver an error message. This is a safety feature on some mods and it’s there to keep you safe. You should always be using an Ohm reader or regulated mod to build your coils. But more importantly, you should always know Ohm’s Law and practice proper battery safety.
1. The Paperclip Method
This is an easy way to clean the tight airflow slots in your atomizer. Simple unfold a paper clip and use it to scrape or dislodge residue and other gunk that has accumulated in the airflow channels.
2. Clean the Connections and Threading
Residue build up doesn't just restrict airflow, it can also be problematic to the battery current flowing to the atomizer. So you've got to keep the contacts clean. Take your vape apart, clean the threading and connections, then reassemble.
3. Soak the Atomizer
This is the best way to deep clean your atomizer so that it looks like new again. Take a bowl of isopropyl alcohol or warm soapy water and let the atomizer soak for 30 minutes.
4. Dry Burn the Atomizer
This a good step regardless of any other method you might use to clean your atomizer. Remove the wicking material from the atomizer, then gently dry burn the coil for a few seconds until the coil begins to glow. Repeat 2 or 3 times until the heated coil is a nice clean orange.
5. Blow Out the Atomizer
This might sound simple, because it is. Remove the atomizer and give it a good hard blow to flush out any gunk that has clogged the airflow. This obviously won't clear out anything that's burned on or really stuck, but it's a quick and easy method for getting out the loose stuff.
6. The Q-Tip Method
Dip a Q-Tip in isopropyl alcohol and swab the coil. This is effective for cleaning out the gunk that you simply cannot reach without a Q-Tip. You'll definitely want to do this when your atomizer starts to taste like burnt hotcakes.
7. Burn Off Leftover Residue
We recommend this as the final step. It helps clear out any remaining stubborn residue. Just fire up the atomizer for a few seconds to give it one last final burn, and that should do the trick.