How do you stain burl wood?
How do you paint faux burl wood?
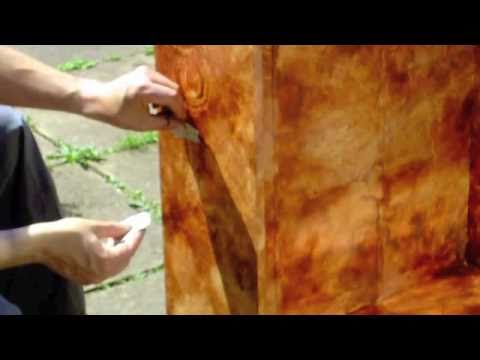
- Cover the work area with newspaper. ...
- Cover any areas you don't wish to paint with painter's tape.
- Open the can of the lightest-colored latex paint. ...
- Dip a paintbrush into the paint tray and use it to coat the project piece.
What is a burl finish?
How do you burr walnut paint?
Can you paint burl wood?

How do you make painted wood look like stained wood?
How much is a wood burl worth?
What makes a burl on a tree?
How can you tell if wood is burl?
How do you paint Walnut effects?
Guest Sunny
I got a Ming coffee table with veneer burp top with the hopes of staining it darker/getting more depth to the burl—would love it to be more like the below statement piece. I’ve stripped and restrained pieces my entire life, but new to veneer...
wtnhighlander
Commercial veneers can be extremely thin, so keep the sanding to a minimum. Use a gentle chemical stripper and patience to remove the existing finish, and beware that even that may soften the glue. You've been warned.
rbbauer00
I am building the steamer trunk that Marc built for Duane in TWW episode 82. For the frame, I chose walnut stained with General Finishes Empire Red water-based dye stain and Arm-R-Seal topcoat. Ever wanting to challenge myself, I am also going to try to veneer my own panels for the first time.
Eric
How about treating the frames to match the burl instead of the other way around, and just leave the burl natural with a clear finish? A little more brown to tone down the red in the frames?
wdwerker
You can thin the dye by diluting it. Thin it until it is just a tint and then use multiple coats to sneak up on the desired color.
dwacker
Is it thin veneer? Is it applied? If not glue your test piece to substrait and press before testing finishes.
Step 2: Holowing It Out
This burl has a hard center, the rotary tool works but I took my chisel and hammer and chipped out the center until I could get a good start with the rotary tool.
Step 3: The Culprit
This little worm showed up. And it is what caused me so much work in making this. The tracks it left behind made the bowl very hard to carve. but in the end he made a tasty treat for out Chickens.
Step 5: Sanding
I starting sanding the inside of the bowl, and I decided to not sand all of the marks out of it. I liked the look that they added to the bowl over all. I really focused on the edges, getting them rounded and smoothed out a little. I like to try to keep things as natural as they were, and not take to much of the character away.
Step 6: Finishing
I made this bowl for more on a novelty piece. I was not planing on useing it for food. but if you waned to I would recommend to get a food safe wood finish. I settled on useing Danish oil, witch worked fine. But I would advise not eating out of it.
Step 7: The End
Over all I liked how it turned out. I would like to thank every one who has looked at my instructable. I would apreacate any comets,criticism,and questions.
8 Comments
hi! I'm getting a burl cut today! I've read a little about how green, dried, and seasoned wood all react a bit differently to carving. I'm excited to get started, but certainly don't want to mess up this piece from my beloved locust tree- What would you recommend I should do before starting in on carving?