
How to replace a coil in a vape?
Apr 20, 2018 · April 20, 2018 by Janet. Here I introduce you a simple way to remove the coil properly. 1. When you unscrew the coil, please pay attention not to screw it at a slant angle. 2. When coil has been used for a long time, you can use dry cloth or paper (with stronger friction) to unscrew if it is not easily unscrewed.
How often should you replace the coil in your vape?
Take a maximum of five dry hits, all while checking not to flood your coils or get the juice into your mouth. Shaking Also known as the vibrating method, this is also a no-power method of breaking-in new coils. With the shaking method, you just must fill your tank with your juice. After that, start shaking the vaping device as hard as you can.
How to properly clean your vape?
Oct 01, 2021 · Once the vape coil is isolated, you'll soak it, as we discussed earlier. You can use warm water and dish soap, vinegar, baking soda, or grain alcohol, and you'll soak for as long as you think you need to (usually 1-2 hours, but a longer soaking session won't damage the coils).
How do I Clean my vape coil?
Let your coil soak in ethanol, vinegar or cheap vodka for at least a couple of hours Place it under the tap and rinse Rinse once more with some distilled water Blow air on the open side of your coil to force water to the wicking holes Set it aside until all water has evaporated

How do you unscrew a coil?
4:489:44Vape Tricks Episode 1 Unscrewing the impossible - YouTubeYouTubeStart of suggested clipEnd of suggested clipOkay just unscrew the top part a little bit okay maintain it in its place and then unscrew that theMoreOkay just unscrew the top part a little bit okay maintain it in its place and then unscrew that the bottom part and you will always end screwed easily both parts even if they are tight.
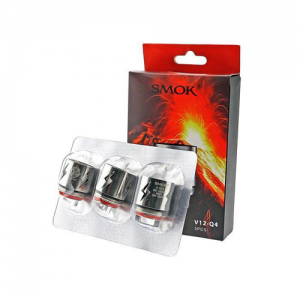
How do you remove a Smok coil?
Step 1 Coil. Unscrew the tank from the mod. ... Make sure there is no vape juice in the tank. You may dispose of any excess juice by pouring it into the trash. ... Disconnect the filter and the atomizer from the bubble tank. ... Unscrew the coil from the filter. ... Throw the old coil away. ... Screw the new coil into the filter.
How do you change a Novo coil?
3:4411:35Smok Novo 4 pod kit - User replaceable coils? - YouTubeYouTubeStart of suggested clipEnd of suggested clipJust open like that put your e-liquid nozzle in when you're finished go ahead and close it up toMoreJust open like that put your e-liquid nozzle in when you're finished go ahead and close it up to replace the coil just pull it out just like that.
How do you change a coil without losing juice?
1:594:37How to change a coil with out losing your juice - YouTubeYouTubeStart of suggested clipEnd of suggested clipStart. If you're pushing it down to the side. It might block. So just fiddle around a bit. There weMoreStart. If you're pushing it down to the side. It might block. So just fiddle around a bit. There we go all the juice a little air I'm just for safety. Put it at the side.
How to break in a new coil?
This is the fastest way to get break-in your new coils. So how does this method work? First, you must start by creating a vacuum. This will see to it that the wicking material takes up the e-liquid faster. Once you have properly set your new coils, block the air inflows. This will ensure that no air gets in. Next, start taking some dry hits. When doing so, do not power your battery. Perhaps, the reason why this method is also referred to as the No Power Method. Take a maximum of five dry hits, all while checking not to flood your coils or get the juice into your mouth.
How to get coils to work faster?
Also known as the vibrating method, this is also a no-power method of breaking-in new coils. With the shaking method, you just must fill your tank with your juice. After that, start shaking the vaping device as hard as you can. The reason for this is to create air bubbles. This method works under the assumption that the air bubbles created will help to push up the liquid faster. This is also among the very fast methods of getting your coils primed.
How long do you have to wait to start vaping?
All you got to do is wait around for your coils to warm up all by themselves. The disadvantage of this method is that one must wait for about 20 minutes before they can start vaping. Other than that, this proves to be the best method of the break-in coil methods.
Why do you need to prime your coils?
Therefore, you need to prime the coil and ensure that your wicking material is saturated. This will prevent the coils from burning your cotton wool, once hot, hence, preventing burnt flavors. Breaking-in your coil is also important in improving the lifespan of your coils and as well as intensifying your flavors.
What Are the Components to Clean in a Vape Device?
The specific components that you'll want to focus on will vary depending on what the vape is designed to do. You'll also see some variation based on specific brands and models, though the following information will give you a good idea of what to expect with most general devices:
When to Clean Your Vape Device
Usually, you'll want to do a minor clean on your vaping device once every 1-2 weeks, with a deeper clean every month, but it’s dependent on how often you are using your vape device. This will help avoid experiencing unexpected burnt flavors and will help keep your internal components in working order.
How to Clean a Vape Tank
Depending on how dirty your vape tank is, there are several different methods you can use to get it comfortably clean. You may be able to get away with just a warm water rinse, or you may need a heftier cleaning agent (like baking soda) to get the job done.
How to Clean Your Vape Coils
If you just want to clean your vape coils, the process is easy! The most important step in cleaning vape coils is to make sure you are only cleaning your vape coils, which means the other components need to be removed. For most vape tanks, this includes removing the drip tip, top cap, the bottom base, and the quartz or plastic tank cover.
How to Clean a Vape Pen?
Vape pens usually require much less cleaning than a vape tank will (especially if using prefilled, disposable cartridges). However, you'll still want to keep residue from building up on the outside of the device (which will naturally happen as vapor comes into contact with the outside of the pen).
How to clean coil heads?
If you still want to clean your coil heads, then you can follow the old soak and rinse method. Let your coil soak in ethanol, vinegar or cheap vodka for at least a couple of hours. Place it under the tap and rinse. Rinse once more with some distilled water.
How to clean AIO vape pen?
The safest and easiest way to clean an AIO vape pen is by using a Q-tip. Soak a Q-tip in propylene glycol or distilled water and wipe the inside of the tank section thoroughly. For even better results, go over it once more with a dry Q-tip. This way you will be able to remove most of the gunk effectively.
What flavorings are used in e-liquid?
Vegetable glycerin and some darker ejuice flavor ings are notorious for gunking up coils, as are most of the sweeteners used in e-liquid manufacturing. A gunked up coil will have lower flavor and vapor production and can make your vape taste burnt.
How to clean a vape tank with ultrasonic cleaner?
Using an ultrasonic cleaner is not a complicated process. Just fill it with water, put all of the parts of your vape tank inside and run it until everything is clean. You could add a couple of drops of dishwashing liquid in your ultrasonic cleaner, but it’s not necessary.
How to clean a septic tank in microwave?
Take your cup or bowl and fill it with water. Place it in the microwave for about two minutes. In the meantime, rinse the parts of your tank under the sink, to get the process started. Next, take out the cup or bowl from the microwave and place your disassembled tank inside of it.
How to clean a tank?
The cleaning agent rinse 1 Baking soda is a good cleaning agent that can be used to get tanks sparkling again. 2 Ethanol, aka grain alcohol, is yet another highly effective substance for cleaning. Don’t get this confused with Isopropyl alcohol which should not be used on the inside of your tank. 3 Cheap Vodka is not a household item, but chances are you can find it at the grocery store. It will do the job and won’t cost you much. 4 Vinegar is a highly acidic cleaning agent but must be thoroughly rinsed to prevent its smell from lingering.
What flavor is lingering after you change the coil head?
This is especially true for tobacco, coffee, menthol, cinnamon and other dominant flavors such as melon, grape or licorice.
How to replace coils in a vape?
Step One: Empty out your vape tank if necessary. Step Two: Unscrew the base from your tank. Step Three: Unscrew your coil, then separate the top portion of your tank so you can replace your coil. Step Four: Attach your new coil to your tank, then re-attach your atomizer parts in the reverse order you took them apart.
How long does a vape coil last?
The answer to this varies depending on how frequently you vape, but typically, the average lifespan of a coil is around two weeks (this can depend on a variety of aspects!).
How to change clearomizer coil?
Step One: Invert your clearomizer so it is upside-down. Step Two: Unscrew your base and atomizer head from the bottom. The stem will remain intact inside your clearomizer. Step Three: Screw on your new coil, and reattach the base and head in the reverse order you took them apart.
What is a top coil clearomizer?
Top coil clearomizers are perfect for vape wizards seeking a cloud chasing experience that provides warm, flavorful vapor and thick, vibrant clouds. Replacing a top coil clearomizer is quick and easy; once you learn the proper steps required to change out the coil, you’ll be able to perform the task in a flash.
How to disassemble a top coil clearomizer?
Step One: Begin by emptying out your tank. When disassembling a top coil clearomizer, the stem of the atomizer comes out along with the base and atomizer head, so starting with an empty tank ensures that you’re able to access the coil quickly and efficiently. Step Two: Next, unscrew the base and coil head. If done properly, the stem should come out ...
What is a multiple coil atomizer?
Multiple coil atomizers are great for those seeking a lavish, extra-indulgent vape experience. Changing the coils for this type of atomizer is much like changing the coils for any other atomizer, except you’ll be changing multiple coils instead of just replacing one.
How to use RBA?
To use an RBA, you must build your own coil (which means you will physically wrap the coil by hand), attach it to your atomizer, and insert your own wick for a one-of-a-kind vape experience. The final type of atomizer is the sub-ohm tank. Sub-ohm tank atomizers use coils that provide less than 1 ohm of resistance.
What is a vape coil?
The vape coil is the heating element you’ll find inside your device. Coils can be split into two types: Rebuildable Coils and Stock Coils. Stock coils are ready-made coils that can usually be fastened onto the device by your hand.
How to clean a vape tank?
The steps for a thorough clean are: 1 First, detach your tank from your vape, empty it, and disassemble it. 2 Dampen a cloth with alcohol (you can use ethanol or even vodka) and scrub each piece to get rid of build-up/stains. 3 Rinse each piece with water and wipe it with a damp cloth, making sure to get rid of all the alcohol left behind. 4 Let the pieces of your tank air dry for 10-15 minutes. Then reassemble your tank, fill it with your delicious liquid, and carry on vaping
What to do after vaping?
After having your vape for a while, you’ll definitely want to start doing some basic vape maintenance—mainly, cleaning your device. A dirty vape has a huge effect on your vaping experience, robbing you of the thick, delicious clouds that you’re looking for. Keeping the different parts of your device clean will help you keep getting those flavorful ...
How to revive a rebuildable coil?
However, if your rebuildable coils are not that old, you can take the following steps to revive them, and get your flavor back: Keep your atomizer attached to your mod and take the atomizer apart. Make sure you leave your coils attached to your RBA (Re-Buildable Atomizer) but remove the cotton wicks.
How do you know if your coils need to be cleaned?
You’ll know your coils need to be cleaned if: They are dark or crusted. You have a burnt or muted flavor. Your atomizer is leaking or spitting juice. For stock coils, or if you’ve had your rebuildable coils for an extended period (more than two months), it might simply be time to replace them.
What is a rebuildable coil?
Rebuildable coils, however, are ones that will need to be attached by using a small screwdriver, or similar tool. Rebuildable coils need to be ‘rewicked’ by the user and don’t come with cotton already installed. Now, dirty coils can be the bane of any vaper’s day. You’ll know your coils need to be cleaned if:
What is a good way to clean a vape tank?
Thorough clean is great for a vape tank with lots of build-up and stains. While it has an extra step or two, a thorough clean will have your tank looking, and functioning, good as new.
How long do vape coils last?
This two-in-one part that contains both the heating element and the wicks doesn't last forever. Most don't last more than one - three months before it has either stopped firing or become 'scorchy', at which point a coil must be thrown out and replaced with a new one.
How to check if a coil is dry?
Finally, before you try out your freshly cleaned coil for the first time, check it for dryness. Hold it in your hand, tap it, touch the wick if you can. If the coil is completely dry, then it is safe to put back into use.
Why does sugary liquid make coils gummy?
But sugary e-liquid is the most notorious culprit. Because the coil elements heat up the liquid directly, the sugar in the mixture caramelizes directly onto the coils which causes them to become gummy and eventually stop working. So if your coil has failed or has become much weaker all too fast, try cleaning the coil before tossing it for a new one.
How to clean a deconstructed tank?
Use a paper towel or your first-hand towel to gently wipe down your coil, along with the other parts of your deconstructed tank. If you prefer, you can lightly damp the towel with water to help remove the oily e-liquid.
What is distilled water?
Distilled water is what you get when steam from boiling water is recollected. The steam is pure H2O and is distilled water when it condenses again. You can buy distilled water or use these tricks to make some at home.
Is it safe to rinse with distilled water?
Distilled water is free of all minerals and other tiny particles that are normally in our tap water. Rinsing once more time with a cup of distilled water isn't actually a necessary step, but it can help you ensure that even the tap water doesn't leave any residue behind on your coils. If you happen to have distilled water or feel like experimenting to make your own, it's a good step to take.
Can you use isopropyl alcohol in a pen?
Really, anything clear, potable (can drink it), and potent will do. Never use isopropyl / rubbing alcohol. This can etch some of the materials used in the coil, tank, and pen construction.
