How to Replace a Vape Coil
- Method 1 Method 1 of 3: Disassembling the Vape Download Article. Unscrew the tank from the body of the vape to expose your coil. ...
- Method 2 Method 2 of 3: Adding a New Coil Download Article. Pre-saturate your coil with 5-8 drops of vape juice. ...
- Method 3 Method 3 of 3: Knowing When to Replace the Coil Download Article. ...

How often should you change the coil on your vape?
Oct 10, 2019 · Quick Tips on changing out your coils! We always get asked on how to change coils, and we all have friends that get us to do it for them, so share this video...
How do you know when to change your coil vape?
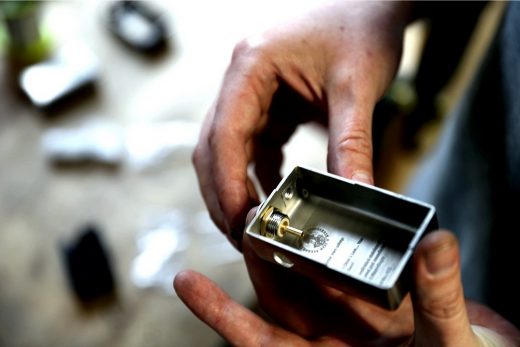
To change the coil, you need to access it. For this purpose, you have to disassemble the vape. Usually, the dissemble procedure is mentioned on vape packaging but if not, simply just unscrew the tank or mouthpiece from the battery. To unscrew the bottom cap, you need to turn the tank upside down so be careful of any spills. Step 2: Remove the coil
How to unclog a vape coil?
Jul 14, 2016 · Misthub's Tutorial Blog Page: https://www.misthub.com/blogs/vape-tutorialsIn this tutorial, we demonstrate how to correctly change the coil in Innokin's iCle...
How to know when to replace coil vape?

How to Replace a Vape Coil
There are two types of vapes available in the market, the pre-filled ones and the refillable ones. The latter one is the more preferred one since you can enjoy different flavors rather than just the one a pre-filled one comes with.
All about a Vape Coil
Vape Coils comprise a wire and a wick that is contained inside the mod’s cartridge. Coils are regularly made of wire with high resistance that is covered by cotton in fiberglass or synthetic foam at times. The wick absorbs the e-Juice resulting in the coil heating up the wick.
How often should you change the vape coil?
A vape coil doesn’t keep going long, generally somewhere in the range of a week to a month relying upon how regularly you use your e-liquid and what your degree of nicotine reliance is. If you do not change your coil on time, it can lead to various problems with the device s well as the vaping experience
3 easy steps to replace the Vape Coil
The replacement for any kind of vape begins with priming the coil so you don’t burn it. Introducing the coil with the wick currently wet helps in guaranteeing that the coil will rapidly retain e-liquid from the tank and will not have any dry pockets that might burn. Priming is essential regardless of the type of vaping gadget you own.
Test the vape
Once you have replaced the coil and put the device together, you are pretty much done with the whole coil replacing procedure. However, you need to test if everything is working okay. In case you find some issues like spillage or keep burning, cautiously repeat the process.
Coil Material
The material of the coil matters a lot so when you’re replacing it make sure to get the one that works the best for you. It can be ceramic, titanium, nickel, nichrome, stainless steel kanthal, etc. Each of these affects flavor and cloud creation.